<?xml version="1.0" encoding="utf-8"?><feed xmlns="http://www.w3.org/2005/Atom" ><generator uri="https://jekyllrb.com/" version="4.3.4">Jekyll</generator><link href="https://www.harvest2cook.com/feed.xml" rel="self" type="application/atom+xml" /><link href="https://www.harvest2cook.com/" rel="alternate" type="text/html" /><updated>2026-04-06T13:18:04+00:00</updated><id>https://www.harvest2cook.com/feed.xml</id><title type="html">Harvest 2 Cook</title><subtitle>From the garden to the table: Sustainable gardening guides and seasonal recipes for the home grower.</subtitle><author><name>Krzysztof</name></author><entry><title type="html">Flavor-First: Designing Your Garden for the Ultimate Kitchen Impact</title><link href="https://www.harvest2cook.com/garden-blog/magazine-main/flavor-first-gardening/" rel="alternate" type="text/html" title="Flavor-First: Designing Your Garden for the Ultimate Kitchen Impact" /><published>2026-03-22T19:00:00+00:00</published><updated>2026-03-22T19:00:00+00:00</updated><id>https://www.harvest2cook.com/garden-blog/magazine-main/flavor-first-gardening</id><content type="html" xml:base="https://www.harvest2cook.com/garden-blog/magazine-main/flavor-first-gardening/"><![CDATA[<h1 id="flavor-first-designing-your-garden-for-the-ultimate-kitchen-impact">Flavor-First: Designing Your Garden for the Ultimate Kitchen Impact</h1>

<p>
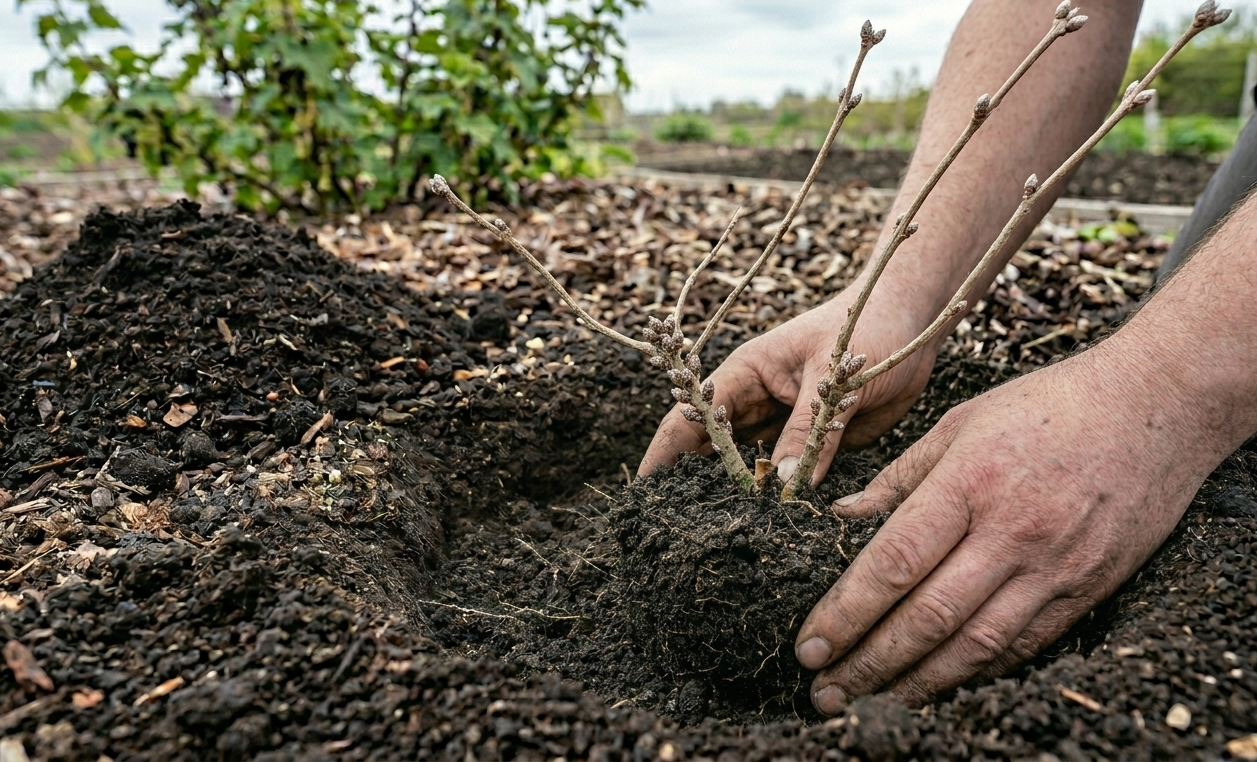
Have you ever bitten into a grocery store tomato and felt… well, nothing? It’s a common heartbreak for food lovers. For years, commercial gardening has focused on yield, shelf-life, and durability during transport. But as we head into the 2026 growing season, a new movement is taking root in backyards across the country: <strong>Flavor-First Gardening</strong>.</p>

<p>We’re shifting the focus back to where it belongs—the taste buds. By choosing specific “chef-preferred” varieties and mastering the timing of your harvest, you can turn your backyard into a gourmet pantry that rivals the best farmer’s markets. Don’t worry if you’re new to this; starting a flavor-focused bed is easier than you think!</p>

<p><img src="/assets/images/April2026/flavor-first-gardening-1.png" alt="Alt Text: A close-up, vibrant shot of a variety of heirloom tomatoes, including deep red San Marzano and bright green-striped varieties, resting in a rustic wooden harvest basket on a sun-drenched garden table." /></p>

<h2 id="the-chefs-list-of-varieties">The “Chef’s List” of Varieties</h2>

<p>If you want the best results in the kitchen, you have to start with the right genetics in the soil. Here are the top trending varieties for 2026 that prioritize culinary impact over everything else:</p>

<h3 id="1-the-sauce-king-san-marzano-tomatoes">1. The Sauce King: San Marzano Tomatoes</h3>
<p>
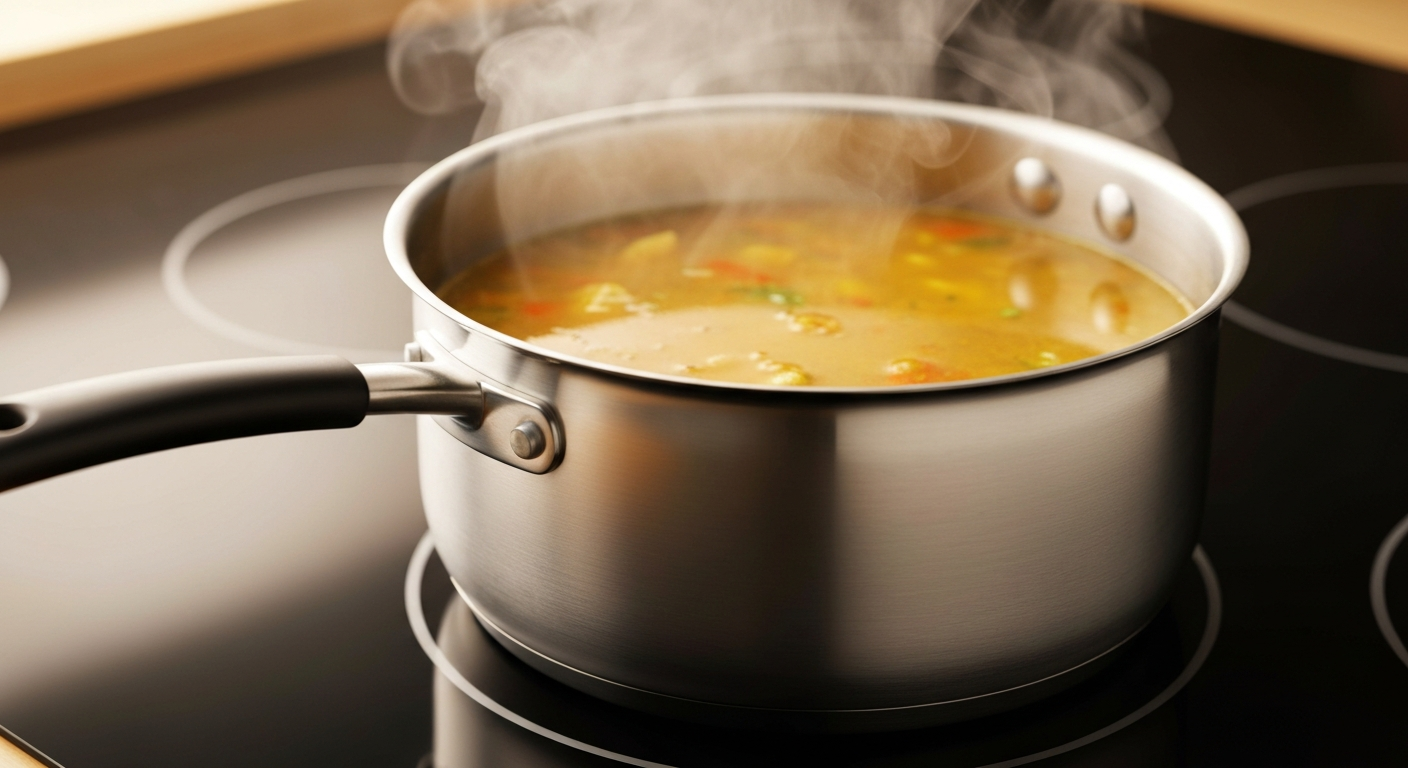
If you’ve ever wondered why Italian pasta sauce tastes different, it’s usually the <strong>San Marzano</strong>. These plum tomatoes are the gold standard because they have high pectin (which makes a thick, silky sauce) and very low moisture (so you don’t have to boil them for hours).</p>
<ul>
  <li><strong>Pro Tip:</strong> Look for ‘San Marzano 2’ or ‘Nano’ varieties if you have a smaller garden or use containers. They offer that same legendary flavor in a more manageable plant size.</li>
</ul>

<h3 id="2-the-pesto-powerhouse-genovese-basil">2. The Pesto Powerhouse: Genovese Basil</h3>
<p>While there are dozens of basil types, <strong>Genovese</strong> remains the undisputed champion for authentic pesto. For 2026, keep an eye out for ‘Everleaf’ varieties. These have been specially bred to bolt (go to seed) much slower, giving you a significantly longer harvest window during the hot summer months.</p>

<h3 id="3-the-versatile-roaster-anaheim-peppers">
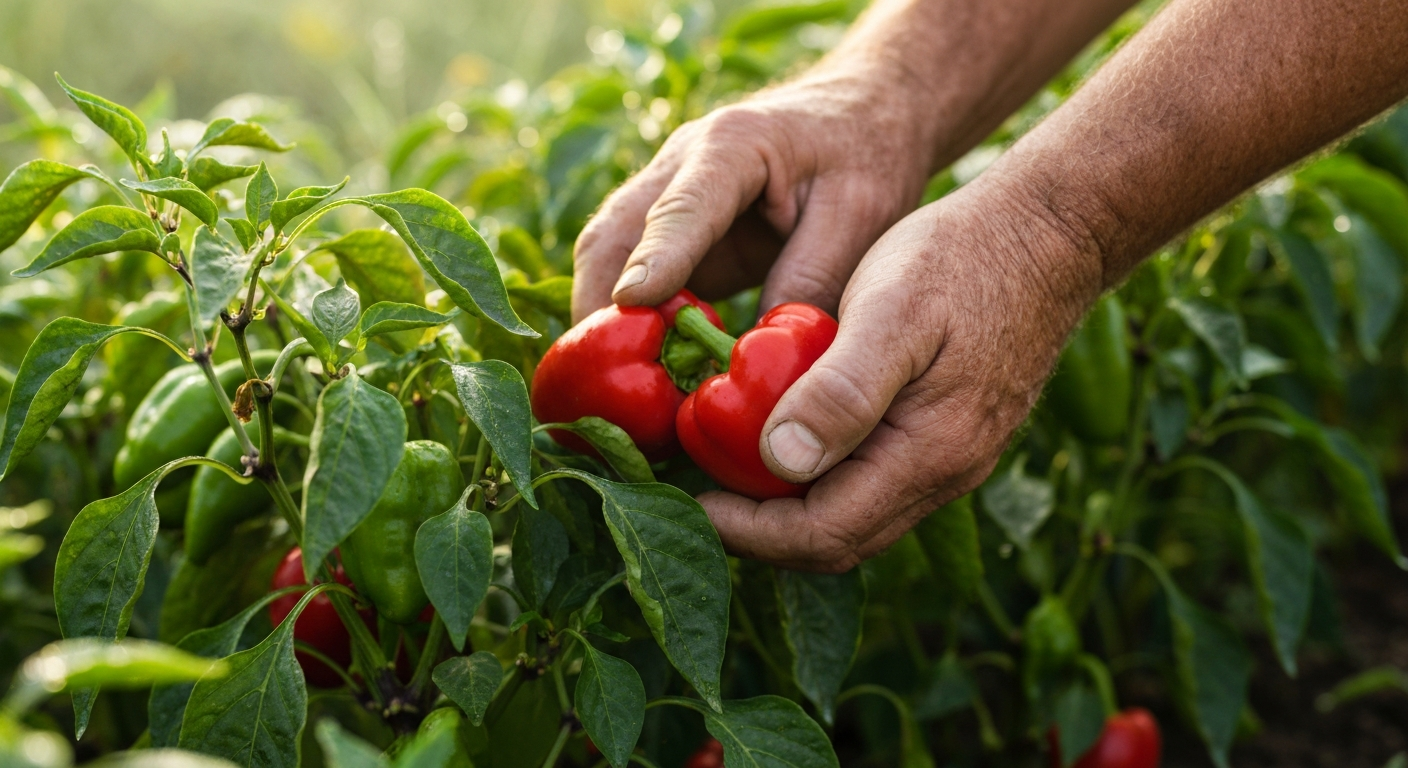
3. The Versatile Roaster: Anaheim Peppers</h3>
<p>If you love the flavor of peppers but find Jalapeños too spicy or Bell Peppers too bland, the <strong>Anaheim</strong> is your new best friend. They have thick walls that hold up beautifully to roasting and a mild heat that enhances other ingredients rather than masking them.</p>

<h3 id="4-the-tropical-kick-scotch-bonnet">4. The Tropical Kick: Scotch Bonnet</h3>
<p>For the adventurous gardener, the <strong>Scotch Bonnet</strong> is trending this year. Beyond its heat, it carries incredible fruity, tropical notes. It’s the essential base for the viral <strong>Haitian Pikliz</strong> (a spicy, pickled slaw) that everyone is talking about this summer.</p>

<p><img src="/assets/images/April2026/flavor-first-gardening-2.png" alt="Alt Text: A beautiful &quot;Pizza Garden&quot; bed featuring a lush San Marzano tomato plant staked in the center, surrounded by vibrant green Genovese basil and dark green oregano, with a few marigolds for color and pest control." /></p>

<h2 id="designing-recipe-beds">
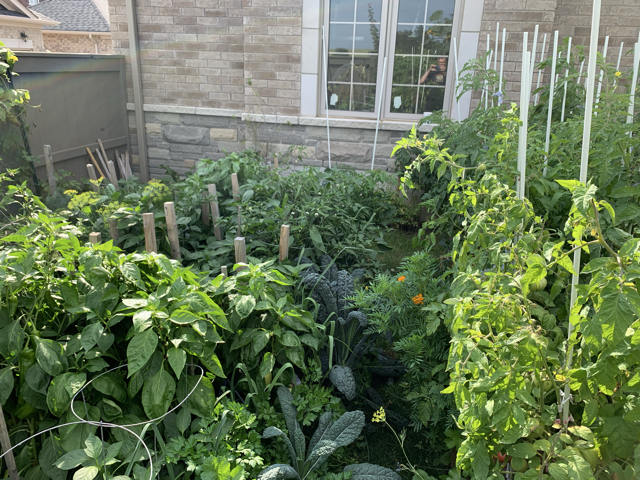
Designing “Recipe Beds”</h2>

<p>
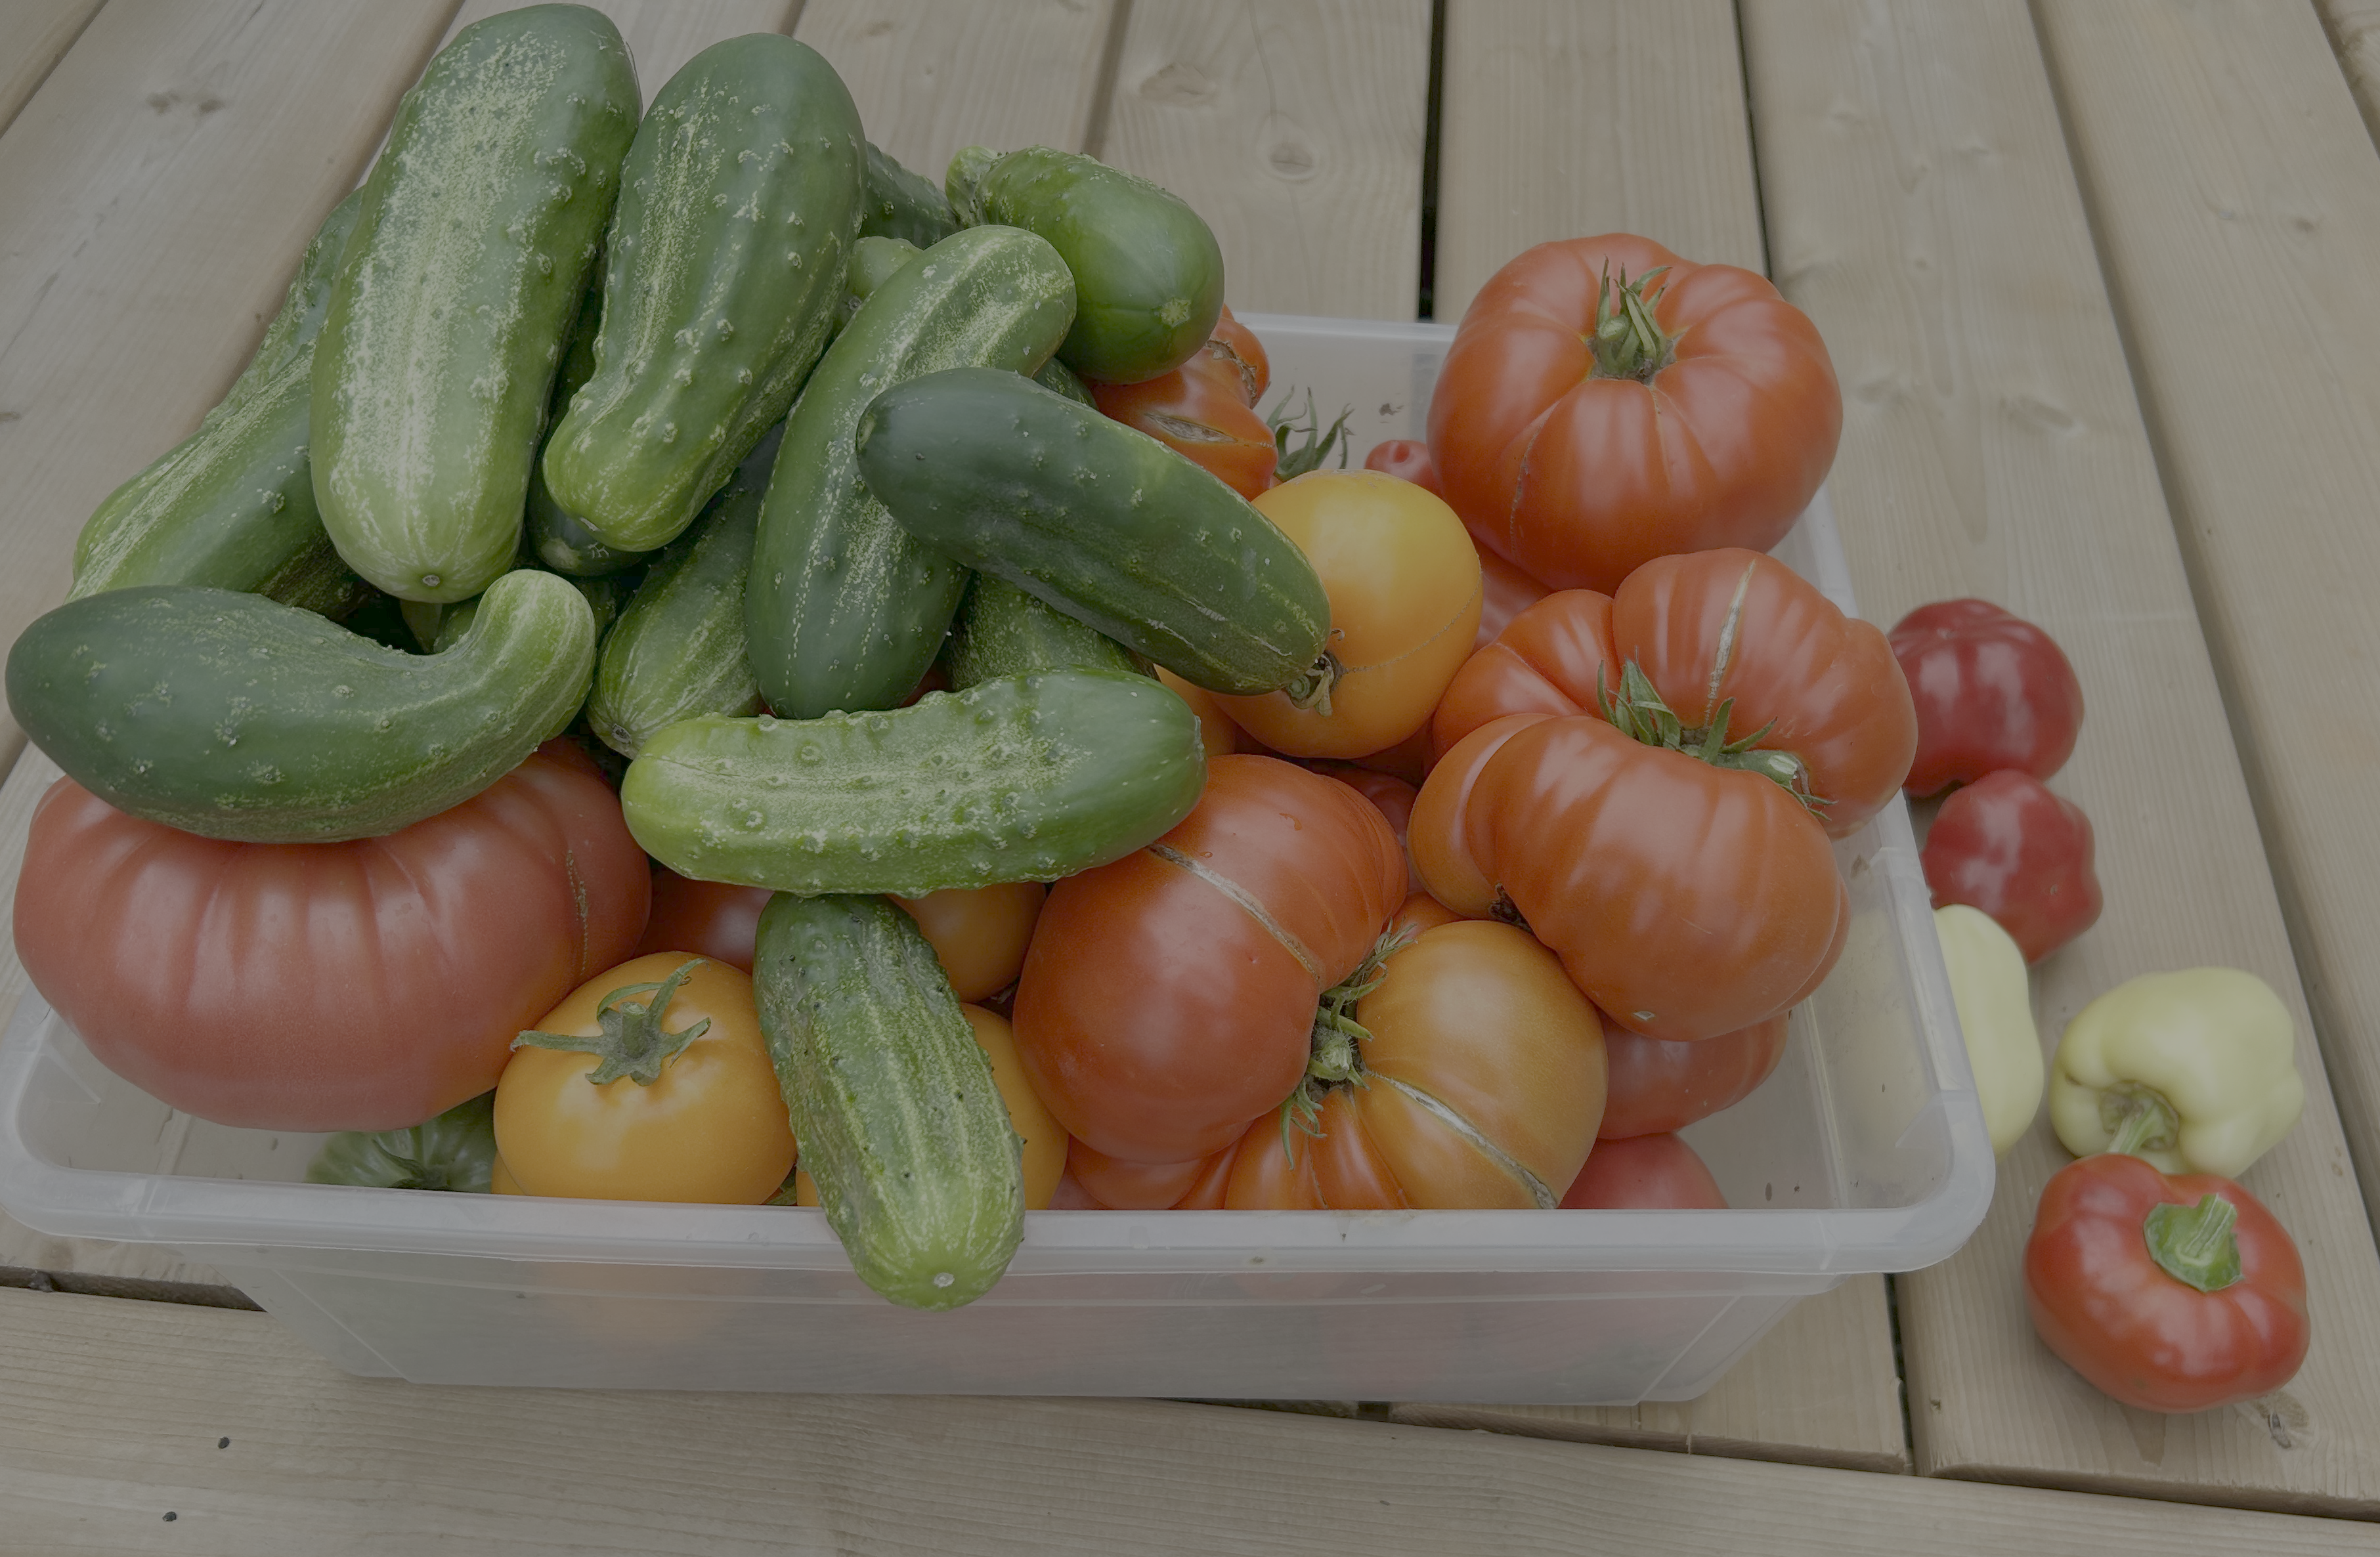
One of our favorite trends for 2026 is the <strong>Recipe Bed</strong>. Instead of planting all your tomatoes in one row and all your herbs in another, try grouping plants based on the meals you love to cook.</p>

<ul>
  <li><strong>The Pizza Bed:</strong> Plant a San Marzano tomato, a Genovese basil plant, and some Greek oregano together. Everything you need for a fresh Margherita pizza is within arm’s reach.</li>
  <li><strong>The Salsa Bed:</strong> Group Anaheim peppers, cilantro, and Roma tomatoes.</li>
  <li><strong>The Pikliz Patch:</strong> Grow Scotch Bonnets alongside cabbage and carrots (though you’ll need a bit more space for the cabbage!).</li>
</ul>

<p>By grouping these plants, you not only make harvesting for a specific meal easier, but you also create a beautiful, intentional garden layout that feels more like an outdoor kitchen.</p>

<h2 id="timing-is-everything-the-morning-harvest">Timing is Everything: The Morning Harvest</h2>

<p>Even the best variety can taste dull if harvested at the wrong time. The 2026 “Flavor-First” rule is simple: <strong>Harvest in the morning.</strong></p>

<p>Plants produce essential oils that give them their unique aroma and taste. During the heat of the day, some of these oils evaporate or retreat into the stems. By picking your tomatoes and herbs while they are still cool from the night air—ideally just as the dew is drying—you capture those oils at their peak concentration.</p>

<p>There is something truly magical about a sun-warmed tomato, but for the most intense culinary impact, get out there with your basket before the midday sun hits.</p>

<p><img src="/assets/images/April2026/flavor-first-gardening-3.png" alt="Alt Text: A gardener's hands gently picking a ripe, red Anaheim pepper from a healthy green plant, with a blurred background of a sunlit vegetable garden." /></p>

<h2 id="pro-tip-stress-can-be-good-in-moderation">Pro Tip: Stress Can Be Good (In Moderation)</h2>
<p>While we usually want to keep our plants happy, some herbs actually taste better when they’re a little “stressed.” For woody herbs like <strong>Rosemary</strong> and <strong>Thyme</strong>, letting the soil dry out slightly between waterings can actually concentrate their essential oils, leading to a much punchier flavor in your cooking!</p>

<h2 id="conclusion">Conclusion</h2>

<p>Gardening for flavor is a journey of reconnection. It’s about slowing down and appreciating the incredible difference that a fresh, high-quality variety can make in your kitchen. Whether you start with a single pot of ‘Everleaf’ Basil or go all-in with a dedicated “Pizza Bed,” your taste buds will thank you. Give it a try this season—you’ll never look at a grocery store tomato the same way again!</p>

<p>Happy Growing!</p>]]></content><author><name>Krzysztof</name></author><category term="garden-blog" /><category term="magazine-main" /><category term="gardening" /><category term="cooking" /><category term="magazine-main" /><summary type="html"><![CDATA[Shift your focus back to the taste buds in the 2026 growing season by choosing "chef-preferred" varieties and mastering harvest timing for a gourmet backyard pantry.]]></summary></entry><entry><title type="html">One-Pan Spring Harvest Roast: A Simple, Weeknight Celebration</title><link href="https://www.harvest2cook.com/cooking-blog/dinners/one-pan-spring-harvest-roast/" rel="alternate" type="text/html" title="One-Pan Spring Harvest Roast: A Simple, Weeknight Celebration" /><published>2026-03-21T23:00:05+00:00</published><updated>2026-03-21T23:00:05+00:00</updated><id>https://www.harvest2cook.com/cooking-blog/dinners/one-pan-spring-harvest-roast</id><content type="html" xml:base="https://www.harvest2cook.com/cooking-blog/dinners/one-pan-spring-harvest-roast/"><![CDATA[<p><img src="/assets/images/Mar2026/one-pan-spring-harvest-roast-done.png" alt="Alt Text: A colorful, steaming sheet pan roast fresh from the oven, featuring golden-brown crispy chicken thighs, roasted potatoes, vibrant green asparagus, and pink radishes." />
<!-- Image Generation Prompt: Professional food photography, top-down view of a large rimmed baking sheet lined with parchment paper. On the sheet are several perfectly roasted, bone-in, skin-on chicken thighs with crispy, golden-brown skin. Surrounding the chicken are halved baby potatoes, sliced carrots, charred lemon rounds, and bright green asparagus spears. Several roasted pink radish halves are scattered throughout, looking tender and glazed. Natural kitchen lighting, appetizing and rustic. --></p>

<p>one-pan-spring-harvest-roast-raw-chicken.png</p>

<h1 id="one-pan-spring-harvest-roast-a-simple-weeknight-celebration">One-Pan Spring Harvest Roast: A Simple, Weeknight Celebration</h1>

<p>If there’s one thing I love more than a bountiful spring harvest, it’s a meal that doesn’t leave me with a mountain of dishes to wash.</p>

<p>This One-Pan Spring Harvest Roast is my go-to for those busy weeknights when we’re transitioning from late-winter root vegetables to the first, tender greens of spring. It’s affordable, kid-friendly, and uses high-flavor chicken thighs that practically cook themselves while you enjoy a glass of wine or a quick garden walk.</p>

<p>The secret to a perfect sheet pan roast is all in the timing—don’t throw everything onto the pan at once! Follow my “staggered roasting” method, and you’ll have perfectly crispy chicken and tender, never-mushy vegetables every single time.</p>

<h2 id="what-youll-need">What You’ll Need</h2>

<p><img src="/assets/images/Mar2026/one-pan-spring-harvest-roast-ingredients.png" alt="Alt Text: Close-up of Ingredients for our tasty one pan chicken harvest roast, with root vegetables, asperagus, leeks, radish, rosemmary or thyme, lemon sliced into roungs and olive oil, salt, and black pepper." />
<!-- Image Generation Prompt: List of ingredients sitting on a cutting board. Close-up of Ingredients for our tasty one pan chicken harvest roast, with root vegetables, asperagus, leeks, radish, rosemmary or thyme, lemon sliced into roungs and olive oil, salt, and black pepper. High detail, professional cooking blog style. --></p>

<p>This recipe is incredibly flexible. Use what’s in your fridge or what’s popping up in the garden!</p>

<ul>
  <li><strong>Chicken Thighs:</strong> 1.5 to 2 lbs of bone-in, skin-on thighs. They are more flavorful and much harder to overcook than breasts.</li>
  <li><strong>Root Vegetables:</strong> 1 lb of small potatoes (halved), 2 carrots (sliced), and 2 parsnips (sliced).</li>
  <li><strong>Spring Greens:</strong> 1 bunch of asparagus (trimmed) or a handful of snap peas.</li>
  <li><strong>Aromatics:</strong> 1 large leek (white and light green parts only, sliced into thick rounds) and 2-3 cloves of garlic.</li>
  <li><strong>The “Secret” Ingredient:</strong> 4-5 radishes, halved. Roasting them makes them sweet and juicy—similar to a tiny turnip!</li>
  <li><strong>Herbs:</strong> Fresh rosemary or thyme for roasting; fresh parsley or dill for garnishing.</li>
  <li><strong>Lemon:</strong> 1 lemon, sliced into rounds (plus a little extra juice for finishing).</li>
  <li><strong>Pantry Staples:</strong> Olive oil, salt, and plenty of black pepper.</li>
</ul>

<h2 id="how-to-do-it">How To Do It</h2>

<ol>
  <li><strong>Preheat the Oven:</strong> Set your oven to <strong>425°F (220°C)</strong>.</li>
  <li><strong>Prep the Pan:</strong> Line a large, rimmed baking sheet with parchment paper for the easiest cleanup of your life.</li>
  <li><strong>Start with the Roots:</strong> Toss the potatoes, carrots, parsnips, and radishes with olive oil, salt, pepper, and your “hard” herbs (rosemary or thyme). Spread them out on the pan, leaving space for the chicken.</li>
  <li><strong>The Chicken Layer:</strong> Pat the chicken thighs dry (this is key for crispy skin!). Rub them with oil and season generously with salt and pepper. Place them <strong>skin-side up</strong> on the pan, surrounded by the root vegetables. Tuck the lemon slices and leek rounds between the chicken pieces.</li>
</ol>

<p><img src="/assets/images/Mar2026/one-pan-spring-harvest-roast-raw-chicken.png" alt="Alt Text: Close-up of seasoned chicken thighs and root vegetables being arranged on a parchment-lined baking sheet before roasting." />
<!-- Image Generation Prompt: Close-up action shot of hands arranging raw, seasoned chicken thighs and halved potatoes on a parchment-lined baking sheet. The chicken skin is lightly oiled and sprinkled with coarse salt, cracked black pepper, and fresh thyme sprigs. Slices of lemon and leeks are tucked between the pieces. Focus is sharp on the texture of the seasoned chicken. High detail, professional cooking blog style. --></p>

<ol>
  <li><strong>The First Roast:</strong> Roast for <strong>20-25 minutes</strong>.</li>
  <li><strong>Add the Spring Greens:</strong> Carefully remove the pan from the oven. Toss the asparagus or snap peas in a little oil and tuck them into any remaining gaps on the pan.</li>
  <li><strong>The Final Roast:</strong> Return the pan to the oven for another <strong>10-15 minutes</strong>. Your chicken is perfectly cooked when its internal temperature reaches <strong>175°F</strong> and the skin is golden and crispy.</li>
  <li><strong>The Finish:</strong> Squeeze a little fresh lemon juice over everything and garnish with your “soft” herbs (parsley or dill).</li>
</ol>

<blockquote>
  <h2 id="pro-tip-the-skin-side-rule">Pro Tip: The Skin-Side Rule</h2>
  <p>Always keep your chicken skin-side up and avoid covering it with vegetables. If you want <em>extra</em> crispy skin, turn on the broiler for the last 2 minutes of cooking—just keep a close eye on it so it doesn’t burn!</p>
</blockquote>

<h2 id="conclusion">Conclusion</h2>

<p>This sheet pan roast is proof that healthy, seasonal eating doesn’t have to be complicated. It’s a complete meal that’s full of flavor and light on the cleanup. Plus, roasting those early-season radishes is a total game-changer that will impress even the most skeptical eaters!</p>

<p>Give it a try this week, and don’t be afraid to swap in whatever’s fresh in your local market or garden. Happy roasting!</p>

<hr />
<p><em>Placeholder: [Image of a colorful sheet pan roast with crispy chicken thighs, golden potatoes, bright green asparagus, and roasted pink radishes]</em>
<img src="/assets/images/Mar2026/one-pan-spring-harvest-roast-done.png" alt="Alt Text: Image of a colorful sheet pan roast with crispy chicken thighs, golden potatoes, bright green asparagus, and roasted pink radishes." /></p>]]></content><author><name>Krzysztof</name></author><category term="cooking-blog" /><category term="dinners" /><category term="spring" /><category term="zone 6" /><category term="family-friendly" /><summary type="html"><![CDATA[A traditional crispy baked chicken, potatoes, and greens.]]></summary></entry><entry><title type="html">Growing Egyptian Walking Onions: The Perennial Wonder of Your Garden</title><link href="https://www.harvest2cook.com/garden-blog/perennials/egyptian-walking-onions/" rel="alternate" type="text/html" title="Growing Egyptian Walking Onions: The Perennial Wonder of Your Garden" /><published>2026-03-21T23:00:05+00:00</published><updated>2026-03-21T23:00:05+00:00</updated><id>https://www.harvest2cook.com/garden-blog/perennials/egyptian-walking-onions</id><content type="html" xml:base="https://www.harvest2cook.com/garden-blog/perennials/egyptian-walking-onions/"><![CDATA[<p><img src="" alt="Alt Text: A cluster of unique Egyptian Walking Onions with tall, sculptural green stalks topped with clusters of small, purple-skinned bulbils." /></p>

<h1 id="growing-egyptian-walking-onions-the-perennial-wonder-of-your-garden">Growing Egyptian Walking Onions: The Perennial Wonder of Your Garden</h1>

<p>If you’re a gardener who loves a plant with personality, you need Egyptian Walking Onions in your life. They aren’t just an edible vegetable; they’re a conversation piece, a sculptural marvel, and one of the most reliable “set-it-and-forget-it” crops you’ll ever grow.</p>

<p>I remember the first time I saw these in a neighbor’s yard—they looked like something out of a Dr. Seuss book. Instead of flowers, they grew a cluster of tiny, purple-skinned onions at the top of their tall stalks. As those little onions got heavier, the stalk would slowly bend over until they touched the soil, where they’d root and start a brand new plant a couple of feet away. They literally “walk” across your garden!</p>

<p>Whether you’re a busy parent looking for an easy project with the kids or a seasoned gardener in Zone 6 looking for a perennial powerhouse, these onions are for you.</p>

<h2 id="what-youll-need">What You’ll Need</h2>

<p><img src="/assets/images/Mar2026/EgiptianWalkinOnionSprouts.png" alt="Alt Text: A close-up of Egyptian Walking Onion sprouts, showing early growth from the bulbils." /></p>

<p>Egyptian Walking Onions (<em>Allium × proliferum</em>) are remarkably hardy. You won’t find them in the seed aisle; you’ll usually need to find a friend who has a patch or order “topsets” (the little bulbs) from a specialty nursery.</p>

<ul>
  <li><strong>Topsets or Bulbils:</strong> These are the little clusters of onions from the top of the plant.</li>
  <li><strong>A Sunny Spot:</strong> They love <strong>full sun</strong> (at least 6-8 hours).</li>
  <li><strong>Well-Draining Soil:</strong> They aren’t picky about soil quality, but they hate “wet feet.” Avoid areas where water pools.</li>
  <li><strong>A Trowel:</strong> For tucking those little bulbs into the ground.</li>
  <li><strong>A Little Patience:</strong> They take a season to really establish their “walking” routine.</li>
</ul>

<h2 id="how-to-do-it">How To Do It</h2>

<ol>
  <li><strong>Pick Your Timing:</strong> You can plant walking onions in early spring, but the <strong>absolute best time is late summer or early fall</strong>. This gives them time to grow roots before winter so they can explode with greens the moment the snow melts.</li>
  <li><strong>Prepare the Bed:</strong> Loosen the soil about 6 inches deep and mix in a little compost if you have it.</li>
  <li><strong>Plant the Bulbils:</strong> Take the individual little onions from the top cluster and plant them <strong>about 1-2 inches deep</strong>.</li>
  <li><strong>Space Them Out:</strong> If you want a dedicated patch, space them <strong>6-10 inches apart</strong>. If you’re just planting them for the green scallions, you can tuck them in every 3 inches.</li>
  <li><strong>Water and Mulch:</strong> Give them a good drink and a thin layer of mulch (like straw or shredded leaves) to keep them cozy over their first winter.</li>
  <li><strong>Let Them Walk:</strong> In their second year, you’ll see the tall stalks and the top clusters. If you want them to spread, let the stalks fall over naturally. If you want to control them, harvest the top clusters and plant them exactly where you want them!</li>
</ol>

<p><img src="/assets/images/Mar2026/Generated_EgiptianWalkingOnion_WalkingSeedPotSproutingAndRooting.png" alt="Alt Text: A generated image of an Egyptian Walking Onion seed pod walking between garden herbs, illustrating its unique growth habit." /></p>

<blockquote>
  <h2 id="pro-tip-the-three-stage-harvest">Pro Tip: The Three-Stage Harvest</h2>
  <p>You can harvest these at three different stages!</p>
  <ol>
    <li><strong>Early Spring:</strong> Use the tender green shoots like scallions.</li>
    <li><strong>Late Summer:</strong> Harvest the “topsets” for pickling or sautéing.</li>
    <li><strong>Anytime:</strong> The large bulb underground is edible, though it’s quite pungent. Most gardeners leave the base bulbs alone to ensure the plant comes back every year.</li>
  </ol>
</blockquote>

<h2 id="conclusion">Conclusion</h2>

<p>Egyptian Walking Onions are the ultimate “lazy gardener” crop. They are perennial, pest-resistant, and they plant themselves if you let them. Plus, they provide some of the earliest fresh food of the spring. Give them a try—your future self (and your kitchen) will thank you for it!</p>

<p>Don’t worry if your garden looks a little “wild” once they start walking—that’s just nature doing its thing. Happy planting!</p>

<hr />
<p><em>Placeholder: [Photo of a tall, spiraling onion stalk with a cluster of small purple bulbils at the top, bending toward the soil]</em></p>]]></content><author><name>Krzysztof</name></author><category term="garden-blog" /><category term="perennials" /><category term="spring" /><category term="zone 6" /><category term="perennials" /><summary type="html"><![CDATA[Plant once and pick and harvest again and again and again. Onion chives, scallops.]]></summary></entry><entry><title type="html">Growing Ginger in Zone 6: The ‘Baby Ginger’ Hack</title><link href="https://www.harvest2cook.com/garden-blog/growing-ginger-zone-6/" rel="alternate" type="text/html" title="Growing Ginger in Zone 6: The ‘Baby Ginger’ Hack" /><published>2026-03-21T23:00:05+00:00</published><updated>2026-03-21T23:00:05+00:00</updated><id>https://www.harvest2cook.com/garden-blog/growing-ginger-zone-6</id><content type="html" xml:base="https://www.harvest2cook.com/garden-blog/growing-ginger-zone-6/"><![CDATA[<p><img src="" alt="Alt Text: A lush potted ginger plant with long, lance-shaped green leaves, sitting on a sun-drenched patio." /></p>

<h1 id="growing-ginger-in-zone-6-the-baby-ginger-hack">Growing Ginger in Zone 6: The “Baby Ginger” Hack</h1>

<p>Can you really grow ginger in a climate where it snows half the year? Believe it or not, the answer is a resounding <strong>yes</strong>.</p>

<p>While ginger is a tropical plant that normally needs 10+ months of warm, humid weather to fully mature, us Zone 6 gardeners have a little trick up our sleeves. We don’t wait for the thick, brown, papery skin you see in the grocery store. Instead, we harvest “baby ginger”—a pink-tipped, thin-skinned, and incredibly flavorful version of the root that you literally can’t buy in most stores.</p>

<p>It takes a little patience and a head start indoors, but the reward is home-grown ginger that is less fibrous and much more aromatic than anything you’ve ever tasted.</p>

<h2 id="what-youll-need">What You’ll Need</h2>

<p><img src="/assets/images/Mar2026/Generated_GingerRoot.png" alt="Alt Text: A close-up of fresh ginger root, showing its textured skin and healthy buds." /></p>

<p>Because ginger is a tropical plant, you’re basically creating a little “mini-vacation” for it in your home or garden.</p>

<ul>
  <li><strong>Organic Ginger Rhizomes:</strong> Buy organic ginger from the grocery store or a specialty nursery. (Non-organic ginger is often treated with growth inhibitors to keep it from sprouting!)</li>
  <li><strong>A Heat Mat:</strong> This is the most important tool for Zone 6 success. Ginger needs consistent warmth (<strong>70-80°F</strong>) to wake up.</li>
  <li><strong>Rich Potting Soil:</strong> Mix equal parts compost, potting soil, and a little sand or perlite for drainage.</li>
  <li><strong>Large Pots:</strong> I recommend containers for Zone 6. They stay warmer than the ground and let you move the plant indoors if there’s a late spring or early fall frost.</li>
  <li><strong>Liquid Fertilizer:</strong> A high-nitrogen organic fertilizer for the peak of summer.</li>
</ul>

<h2 id="how-to-do-it">How To Do It</h2>

<ol>
  <li><strong>Start Early (Feb/March):</strong> Don’t wait until May! In Zone 6, you need to “pre-sprout” your ginger indoors in late winter.</li>
  <li><strong>Prep the Rhizomes:</strong> Cut your ginger into 2-inch pieces, making sure each piece has at least one “eye” or bud. Let the cut ends dry and “callus” for <strong>24-48 hours</strong> before planting to prevent rot.</li>
  <li><strong>The Sprouting Stage:</strong> Place your ginger pieces in a shallow tray of moist potting soil, barely covering them. Put that tray on a <strong>heat mat</strong>. This is where most people fail—without that bottom heat, ginger can take months to sprout.</li>
  <li><strong>Wait for the Shoots:</strong> Once you see green shoots poking through, move the tray to a bright, sunny window.</li>
  <li><strong>Move Outdoors (June):</strong> Once the nighttime temperatures are consistently above <strong>55°F</strong>, you can move your pots outside.</li>
  <li><strong>Find the Right Light:</strong> Ginger loves bright, filtered light. Avoid placing it in the scorching, direct afternoon sun, which can burn the delicate tropical leaves.</li>
  <li><strong>Water and Feed:</strong> Keep the soil moist (but not soggy!) and feed it with liquid fertilizer every 2-3 weeks during the summer.</li>
</ol>

<blockquote>
  <h2 id="pro-tip-the-baby-ginger-harvest">Pro Tip: The “Baby Ginger” Harvest</h2>
  <p>In Zone 6, we harvest our ginger just before the first frost in autumn. The skin will be very thin and translucent, so you don’t even need to peel it! Just grate the whole thing into your favorite stir-fry or tea.</p>
</blockquote>

<p><img src="/assets/images/Mar2026/GingerSproutsBrokenFromMainGingerPlant.png" alt="Alt Text: A close-up of ginger sprouts broken from the main plant, ready for transplanting or use." /></p>

<h2 id="conclusion">Conclusion</h2>

<p>Growing ginger in a cooler climate is a fun challenge that pays off in big flavor. It’s a great project for a sunny windowsill and a perfect way to bring a little tropical vibe to your backyard. Give it a try this year—your winter teas will thank you!</p>

<p>Don’t worry if it takes a while to sprout—ginger is famously slow. Just keep it warm, keep it moist, and enjoy the process. Happy gardening!</p>

<hr />
<p><em>Placeholder: [Image of a potted ginger plant with long, lush green leaves and a close-up of the pink-tipped baby ginger rhizome being harvested]</em></p>]]></content><author><name>Krzysztof</name></author><category term="garden-blog" /><category term="spring" /><category term="zone 6" /><summary type="html"><![CDATA[Grow your own ginger. A little early spring prep can lead to piles of your own ginger]]></summary></entry><entry><title type="html">Already tried growing ginger in Zone 6, you’re ready for the next level: Turmeric</title><link href="https://www.harvest2cook.com/garden-blog/growing-turmeric-zone-6/" rel="alternate" type="text/html" title="Already tried growing ginger in Zone 6, you’re ready for the next level: Turmeric" /><published>2026-03-21T23:00:05+00:00</published><updated>2026-03-21T23:00:05+00:00</updated><id>https://www.harvest2cook.com/garden-blog/growing-turmeric-zone-6</id><content type="html" xml:base="https://www.harvest2cook.com/garden-blog/growing-turmeric-zone-6/"><![CDATA[<p><img src="" alt="Alt Text: A lush potted turmeric plant with large, broad, vibrant green leaves that resemble a tropical hosta." /></p>

<h1 id="growing-turmeric-in-zone-6-a-tropical-secret-for-your-garden">Growing Turmeric in Zone 6: A Tropical Secret for Your Garden</h1>

<p>If you’ve already tried growing ginger in Zone 6, you’re ready for the next level: <strong>Turmeric</strong>.</p>

<p>Turmeric (<em>Curcuma longa</em>) is ginger’s slightly more dramatic cousin. It has broader, lush green leaves that look like something out of a jungle and a bright orange root that is one of the most powerful anti-inflammatory foods you can grow.</p>

<p>Like ginger, turmeric is a tropical perennial. In our cooler Zone 6 climate, we treat it as a long-season container plant that needs a serious head start indoors. If you’re willing to give it some warmth and patience, you can harvest “baby turmeric”—a vibrant, thin-skinned version of the root that makes the store-bought stuff look dull in comparison.</p>

<h2 id="what-youll-need">What You’ll Need</h2>

<p><img src="/assets/images/Mar2026/MySpringPrep_TumericRoot_SproutedInPot.png" alt="Alt Text: A close-up of a turmeric root sprouted in a pot, showing new shoots emerging." /></p>

<p>Because turmeric is a tropical plant, we’re going to give it a little “spa day” to help it wake up.</p>

<ul>
  <li><strong>Organic Turmeric Rhizomes:</strong> Look for plump, firm roots with small “eyes” (buds) on them. Shriveled ones are much harder to sprout.</li>
  <li><strong>A Heat Mat:</strong> Turmeric is even more “heat-loving” than ginger. It needs consistent soil temps of <strong>75-85°F</strong> to wake up from its winter slumber.</li>
  <li><strong>Wide, Shallow Pots:</strong> Turmeric roots grow horizontally, so a wide pot (like a whiskey barrel half or a large trough) is better than a deep one.</li>
  <li><strong>Rich Potting Soil:</strong> Mix plenty of compost into your potting mix. Turmeric is a heavy feeder!</li>
  <li><strong>A Humidity Dome (or Plastic Wrap):</strong> To keep the soil moist during the long sprouting phase.</li>
</ul>

<h2 id="how-to-do-it">How To Do It</h2>

<ol>
  <li><strong>Start Early (Feb/March):</strong> Don’t wait! Turmeric can take <strong>4-6 weeks</strong> just to show its first green shoot.</li>
  <li><strong>Prep and Sprout:</strong> Place your turmeric rhizomes in a shallow tray of moist potting soil. Barely cover them. Place the tray on a <strong>heat mat</strong> and cover it with a humidity dome or plastic wrap.</li>
  <li><strong>The Waiting Game:</strong> Keep the soil moist but not soggy. Don’t worry if nothing happens for a month—turmeric is famously slow to wake up!</li>
  <li><strong>Bright Light:</strong> Once you see those first green shoots, move the tray to a bright, south-facing window.</li>
  <li><strong>Move Outdoors (June):</strong> Wait until nighttime temperatures are consistently above <strong>60°F</strong>. Turmeric is more sensitive to cold than ginger, so don’t rush it!</li>
  <li><strong>Afternoon Shade:</strong> Turmeric loves the heat but can get leaf scorch in the intense afternoon sun. Find a spot with dappled shade or morning sun and afternoon protection.</li>
  <li><strong>Water and Feed:</strong> Keep the soil consistently moist and feed it with a balanced organic liquid fertilizer every 2 weeks during the summer.</li>
</ol>

<blockquote>
  <h2 id="pro-tip-the-baby-turmeric-harvest">Pro Tip: The “Baby Turmeric” Harvest</h2>
  <p>In late fall, as temperatures drop, you’ll see the lush leaves start to turn yellow and die back. This is your signal that the rhizomes are ready! Since it’s “baby turmeric,” the skin is very thin—you don’t even need to peel it! Just grate it directly into your golden milk, curries, or smoothies.</p>
</blockquote>

<p><img src="/assets/images/Mar2026/MySpringPrep_TumericRootSproutedMoreShoots.png" alt="Alt Text: A close-up of turmeric root with more shoots sprouted, showing vigorous growth." /></p>

<h2 id="conclusion">Conclusion</h2>

<p>Growing turmeric in Zone 6 is a fun, rewarding challenge. Even if you don’t get a massive harvest, the plants themselves are beautiful and tropical, making them a great addition to your patio or deck. Give it a try this year—your winter smoothies will be much more vibrant for it!</p>

<p>Don’t worry if it’s slow to sprout—that’s just turmeric being turmeric. Keep it warm, keep it moist, and enjoy the jungle vibes. Happy gardening!</p>

<hr />
<p><em>Placeholder: [Image of a large potted turmeric plant with its broad, hosta-like leaves and a handful of freshly harvested, bright orange baby turmeric rhizomes]</em></p>]]></content><author><name>Krzysztof</name></author><category term="garden-blog" /><category term="spring" /><category term="zone 6" /><summary type="html"><![CDATA[Grow your own tumeric. A little experiment to turn something not native to this colder climate to something that can grow and prosper. You can even turn it into a house plan over winter.]]></summary></entry><entry><title type="html">Planting Asparagus for Spring Harvests: The 20-Year Garden Investment</title><link href="https://www.harvest2cook.com/garden-blog/perennials/planting-asparagus/" rel="alternate" type="text/html" title="Planting Asparagus for Spring Harvests: The 20-Year Garden Investment" /><published>2026-03-21T23:00:05+00:00</published><updated>2026-03-21T23:00:05+00:00</updated><id>https://www.harvest2cook.com/garden-blog/perennials/planting-asparagus</id><content type="html" xml:base="https://www.harvest2cook.com/garden-blog/perennials/planting-asparagus/"><![CDATA[<p><img src="" alt="Alt Text: A professional garden shot of a mature asparagus bed in early spring, with several thick, vibrant green spears poking through dark, mulched soil." /></p>

<h1 id="planting-asparagus-for-spring-harvests-the-20-year-garden-investment">Planting Asparagus for Spring Harvests: The 20-Year Garden Investment</h1>

<p>If you’re a gardener who loves a long-term plan, you need an asparagus bed.</p>

<p>Unlike most vegetables, asparagus is a perennial, meaning you plant it once, and it comes back year after year for <strong>15 to 20 years</strong>. It’s the ultimate “gift that keeps on giving” for your garden and your dinner table.</p>

<p>But there’s a catch: it takes a little patience. If you’re willing to put in the work now and wait a couple of seasons for your first harvest, you’ll be rewarded with some of the sweetest, freshest spears you’ve ever tasted.</p>

<p>Whether you’re a busy parent looking for a low-maintenance crop or a Zone 6 gardener looking for a spring powerhouse, planting asparagus is a project that’s well worth the effort.</p>

<h2 id="what-youll-need">What You’ll Need</h2>

<p><img src="" alt="Alt Text: A pile of 1-year-old asparagus crowns, showing their long, spindly, spider-like roots and small central buds." /></p>

<p>Since this is a permanent bed, site selection and preparation are <strong>everything</strong>.</p>

<ul>
  <li><strong>Asparagus Crowns:</strong> Buy 1-year-old crowns of an all-male hybrid like <strong>‘Jersey Knight’</strong> or <strong>‘Millennium’</strong>. They are more vigorous and don’t waste energy on seeds.</li>
  <li><strong>A Permanent Sunny Spot:</strong> At least 6-8 hours of direct sun. Choose a location where you won’t need to move the plants later!</li>
  <li><strong>Well-Drained Soil:</strong> Asparagus hates “wet feet.” Avoid low spots in your garden.</li>
  <li><strong>Compost or Well-Rotted Manure:</strong> Asparagus is a heavy feeder and loves rich, loose soil.</li>
  <li><strong>A Shovel:</strong> For digging the “trench and mound” system.</li>
</ul>

<h2 id="how-to-do-it">How To Do It</h2>

<ol>
  <li><strong>Prepare the Bed:</strong> Clear the area of all weeds. Loosen the soil about 1 foot deep and mix in plenty of compost.</li>
  <li><strong>Dig the Trench:</strong> Dig a trench about <strong>6-8 inches deep</strong> and 12 inches wide. If you’re planting multiple rows, space the trenches <strong>3 feet apart</strong> (those summer ferns get big!).</li>
  <li><strong>Create the Mound:</strong> In the bottom of the trench, use your soil-compost mix to create a small mound every 12-18 inches.</li>
  <li><strong>The Crown Drop:</strong> Place each crown on top of a mound, draping its long, spider-like roots over the sides.</li>
</ol>

<p><img src="" alt="Alt Text: A gardener's hands carefully placing an asparagus crown on a small mound of soil inside a long, deep planting trench." /></p>

<ol>
  <li><strong>The Initial Cover:</strong> Fill the trench with only <strong>2-3 inches of soil</strong> initially. Don’t fill it all the way yet!</li>
  <li><strong>Gradual Fill:</strong> As the spears emerge and grow, gradually fill in the rest of the trench with soil over the first season until it’s level with the surrounding ground.</li>
  <li><strong>Water and Mulch:</strong> Give the bed a good drink and a thick layer of mulch (like straw or wood chips) to suppress weeds.</li>
</ol>

<blockquote>
  <h2 id="pro-tip-the-patience-rule-year-1--2">Pro Tip: The Patience Rule (Year 1 &amp; 2)</h2>
  <p>This is the hardest part: <strong>Do not harvest any spears in your first year</strong>. Let them grow into tall, feathery “ferns” to build energy in the roots. In Year 2, you can do a very light 1-week harvest if the plants are vigorous, but it’s best to wait until <strong>Year 3</strong> for your first real 2-3 week harvest. By <strong>Year 4</strong>, you can harvest for a full 6-8 weeks!</p>
</blockquote>

<h2 id="conclusion">Conclusion</h2>

<p>Planting an asparagus bed is a true investment in your future self. It’s one of the first things to pop up in the spring and one of the most rewarding crops to grow. Give it some love and patience, and your garden will be providing you with fresh, delicious spears for decades to come.</p>

<p>Happy planting, and enjoy the anticipation!</p>

<hr />
<p><em>Placeholder: [Image of a freshly dug asparagus trench with crowns placed on mounds, and a separate photo of mature, feathery asparagus ferns in the summer]</em></p>]]></content><author><name>Krzysztof</name></author><category term="garden-blog" /><category term="perennials" /><category term="spring" /><category term="zone 6" /><category term="family-friendly" /><summary type="html"><![CDATA[Establish a perennial asparagus bed in Zone 6 for decades of fresh spring harvests.]]></summary></entry><entry><title type="html">Planting Black &amp;amp; Red Currants: A Sweet and Tangy Garden Duo</title><link href="https://www.harvest2cook.com/garden-blog/perennials/planting-currants/" rel="alternate" type="text/html" title="Planting Black &amp;amp; Red Currants: A Sweet and Tangy Garden Duo" /><published>2026-03-21T23:00:05+00:00</published><updated>2026-03-21T23:00:05+00:00</updated><id>https://www.harvest2cook.com/garden-blog/perennials/planting-currants</id><content type="html" xml:base="https://www.harvest2cook.com/garden-blog/perennials/planting-currants/"><![CDATA[<p><img src="/assets/images/April2026/planting-currants-1.png" alt="Alt Text: A close-up of a currant bush branch heavily laden with clusters of translucent, ruby-red berries glistening in the sunlight." />
<!-- Image Generation Prompt: Macro photography of red currants (Ribes rubrum) hanging in long, graceful clusters from a green-leaved branch. The berries are perfectly round, translucent, and a deep ruby-red color, with tiny dark seeds visible inside. Dappled sunlight creates highlights on the skins. Professional garden photography, vibrant and appetizing. --></p>

<h1 id="planting-black--red-currants-a-sweet-and-tangy-garden-duo">Planting Black &amp; Red Currants: A Sweet and Tangy Garden Duo</h1>

<p>If you’re looking for a productive, hardy, and beautiful addition to your edible landscape, look no further than currants.</p>

<p>These small, jewel-like berries are superstars of the cool-season garden. Whether you’re a fan of the earthy, aromatic punch of black currants or the bright, tart snap of red and white currants, these shrubs are a fantastic investment for any Zone 6 gardener.</p>

<p>They are remarkably productive, taking up relatively little space while providing an abundance of fruit for jams, juices, and desserts. Plus, they’re one of the few berries that actually appreciate a little afternoon shade—making them perfect for those “not-quite-full-sun” spots in your yard.</p>

<h2 id="what-youll-need">What You’ll Need</h2>

<p><img src="/assets/images/April2026/planting-currants-2.png" alt="Alt Text: A comparison of black and red currant berries, showing the deep purple-black skin of one and the bright red translucence of the other." />
<!-- Image Generation Prompt: A top-down shot of two small white ceramic bowls on a wooden table. One bowl is filled with plump, matte-finish dark purple-black currants. The other bowl is filled with shiny, translucent bright red currants. A few green leaves are scattered between the bowls. High contrast, professional food photography style. --></p>

<p>While they are cousins, black and red currants have slightly different personalities.</p>

<ul>
  <li><strong>Currant Bushes:</strong> Choose <strong>mildew-resistant varieties</strong> (like <strong>‘Titania’</strong> for black currants) to make your life easier.</li>
  <li><strong>Rich, Moisture-Retentive Soil:</strong> Currants are heavy feeders and love plenty of compost or well-rotted manure.</li>
  <li><strong>A Semi-Shady Spot:</strong> In Zone 6, currants appreciate <strong>morning sun and afternoon shade</strong> to prevent their berries from “cooking” in the summer heat.</li>
  <li><strong>Mulch:</strong> A thick layer of wood chips or straw to keep their shallow roots cool and moist.</li>
  <li><strong>Pruning Shears:</strong> For the essential “renewal pruning” every winter.</li>
</ul>

<h2 id="how-to-do-it">How To Do It</h2>

<ol>
  <li><strong>Timing:</strong> Plant your currants in <strong>late autumn or early spring</strong> while they are dormant.</li>
  <li><strong>Depth Matters:</strong> This is the most important part!
    <ul>
      <li><strong>Black Currants:</strong> Plant them about <strong>2 inches deeper</strong> than they were in the nursery pot. This encourages more stems to grow from the base, giving you a bushier, more productive plant.</li>
      <li><strong>Red &amp; White Currants:</strong> Plant them at the <strong>same depth</strong> as the nursery pot.</li>
    </ul>
  </li>
</ol>

<p><img src="/assets/images/April2026/black-current-shrub-planted.png" alt="Alt Text: A gardener planting a young black currant bush in a garden bed, ensuring it is placed slightly deeper than its nursery pot level." />
<!-- Image Generation Prompt: Close-up of a person's hands planting a dormant, bare-root currant shrub into a hole in dark, rich garden soil. The roots are spread out, and the soil line on the stems shows it being planted about 2 inches deeper than its previous growth mark. A pile of dark compost is nearby. High detail, educational gardening shot. --></p>

<ol>
  <li><strong>Spacing:</strong> Space your bushes <strong>4-5 feet apart</strong>. They need good air circulation to prevent powdery mildew.</li>
  <li><strong>Water and Mulch:</strong> Give them a deep drink and a 3-4 inch layer of mulch.</li>
  <li><strong>Pruning (The “Renewal” Method):</strong> Every winter, remove about <strong>one-third of the oldest, darkest wood</strong> from your black currants right down to the base. This keeps the plant young and vigorous, as black currants fruit best on wood grown the previous summer.</li>
</ol>

<blockquote>
  <h2 id="pro-tip-the-sawfly-watch">Pro Tip: The Sawfly Watch</h2>
  <p>Keep an eye out for the <strong>currant sawfly</strong> in early spring. Its larvae can defoliate a bush in just a few days! Check the lower, inner leaves for small green caterpillars and hand-pick them as soon as you see them.</p>
</blockquote>

<h2 id="conclusion">Conclusion</h2>

<p>Currants are one of the most rewarding and under-appreciated berries for the home garden. They’re easy to grow, remarkably productive, and they bring a unique, sophisticated flavor to your kitchen. Give them a try—they’re a small investment that will pay off in sweet and tangy rewards for years to come.</p>

<p>Happy planting, and enjoy the jewel-like harvest!</p>

<hr />

<p><img src="/assets/images/April2026/planting-currants-1.png" alt="Alt Text: A close-up of a currant bush branch heavily laden with clusters of translucent, ruby-red berries glistening in the sunlight." /></p>]]></content><author><name>Krzysztof</name></author><category term="garden-blog" /><category term="perennials" /><category term="spring" /><category term="zone 6" /><category term="family-friendly" /><category term="perennials" /><summary type="html"><![CDATA[Add productive black and red currant bushes to your garden for beautiful foliage and abundant harvests.]]></summary></entry><entry><title type="html">Planting Hard Neck Garlic: The Zone 6 Fall Power Move</title><link href="https://www.harvest2cook.com/garden-blog/overwinter/sidebar-article/planting-hard-neck-garlic/" rel="alternate" type="text/html" title="Planting Hard Neck Garlic: The Zone 6 Fall Power Move" /><published>2026-03-21T23:00:05+00:00</published><updated>2026-03-21T23:00:05+00:00</updated><id>https://www.harvest2cook.com/garden-blog/overwinter/sidebar-article/planting-hard-neck-garlic</id><content type="html" xml:base="https://www.harvest2cook.com/garden-blog/overwinter/sidebar-article/planting-hard-neck-garlic/"><![CDATA[<p><img src="/assets/images/April2026/garlic-bed.png" alt="Alt Text: A close-up of several large, plump hardneck garlic bulbs with beautiful purple-streaked papery skins." />
<!-- Image Generation Prompt: Professional food and garden photography of hardneck garlic bulbs (Allium sativum var. ophioscorodon). The bulbs have thick, sturdy central stems and papery skins with vibrant purple and burgundy streaks. They are resting on a rustic burlap sack. Natural, warm afternoon light, high resolution, emphasizing the gourmet quality of the garlic. --></p>

<h1 id="planting-hard-neck-garlic-the-zone-6-fall-power-move">Planting Hard Neck Garlic: The Zone 6 Fall Power Move</h1>

<p>If there is one crop that truly makes you feel like a “real” gardener, it’s garlic.</p>

<p>Specifically, <strong>hardneck garlic</strong>. While softneck garlic is what you typically see in the grocery store (with its white, papery skin and mild flavor), hardneck varieties are the gourmet gems of the garden. They are incredibly cold-hardy, they have a richer and more complex flavor, and they give you a “bonus harvest” of curly green scapes in early summer.</p>

<p>In Zone 6, planting garlic is our ultimate fall power move. It’s one of the last things we tuck into the ground before winter sets in, and it’s the very first thing to poke its green head up in the spring.</p>

<p>Whether you’re a busy parent looking for a “set it and forget it” crop or a foodie gardener, planting garlic is a rewarding project that pays off in big flavor.</p>

<h2 id="what-youll-need">What You’ll Need</h2>

<p><img src="/assets/images/April2026/planting-hard-neck-garlic-2.png" alt="Alt Text: A gardener's hand placing a large, unpeeled garlic clove into a hole in dark, rich soil with the pointy end facing up." />
<!-- Image Generation Prompt: Close-up, macro photography of a person's hand planting a single, large garlic clove into a small hole in dark, crumbly earth. The clove is unpeeled with its tan papery skin intact, and it is positioned with the pointed end facing upwards. The surrounding soil is moist and dark. Professional gardening tutorial style. --></p>

<p>Garlic is a heavy feeder, so preparation is key!</p>

<ul>
  <li><strong>Hardneck Garlic Bulbs:</strong> Buy high-quality, organic “seed garlic” from a nursery. Don’t use grocery store garlic—it’s often treated with growth inhibitors and might not be suited for our climate!</li>
  <li><strong>A Sunny Spot:</strong> Garlic loves <strong>full sun</strong> (at least 6-8 hours).</li>
  <li><strong>Rich, Loose Soil:</strong> Mix plenty of compost into your bed before planting.</li>
  <li><strong>Mulch:</strong> A 4-6 inch layer of straw or shredded leaves to protect the cloves from “frost heaving” during the winter.</li>
  <li><strong>A Garden Fork:</strong> For gently lifting the soil during the summer harvest.</li>
</ul>

<h2 id="how-to-do-it">How To Do It</h2>

<ol>
  <li><strong>Timing:</strong> In Zone 6, the ideal planting window is <strong>late October to early November</strong>. You want the roots to establish before the ground freezes, but you don’t want too much green growth above the soil.</li>
  <li><strong>Separate the Cloves:</strong> Just before planting, break the bulbs apart into individual cloves. Keep the papery “tunic” (skin) on each one!</li>
  <li><strong>Choose the Big Ones:</strong> Only plant the largest cloves—these will give you the largest bulbs next summer.</li>
  <li><strong>The Deep Dive:</strong> Plant each clove <strong>3-4 inches deep</strong>, with the “pointy end” facing up.</li>
  <li><strong>Spacing:</strong> Space your cloves <strong>6 inches apart</strong> to allow for large bulb development.</li>
  <li><strong>The Mulch Blanket:</strong> Immediately after planting, cover the bed with a thick layer of straw or leaves. This is essential for a successful Zone 6 winter.</li>
  <li><strong>Spring Feed:</strong> As soon as you see green shoots poking through in the spring, “side-dress” the plants with a little nitrogen-rich organic fertilizer.</li>
  <li><strong>The Scape Harvest:</strong> In June, your hardneck garlic will grow a curly flowering stalk called a <strong>scape</strong>. Cut these off once they’ve curled once or twice—this redirects the plant’s energy into the bulb. (And bonus: they’re delicious in pesto!)</li>
</ol>

<p><img src="/assets/images/April2026/Garlic_Stalks_closeup.png" alt="Alt Text: A bunch of curly, bright green garlic scapes recently harvested from the garden, showing their elegant spiral shape." />
<!-- Image Generation Prompt: A close-up shot of a handful of freshly harvested garlic scapes. The scapes are long, thin, and vibrant green, coiling into elegant, whimsical loops and spirals. They have small, pointed flower buds at the tips. The background is a soft-focus summer garden. Bright, natural light, high detail on the smooth texture of the scapes. --></p>

<blockquote>
  <h2 id="pro-tip-the-harvest-indicator">Pro Tip: The Harvest Indicator</h2>
  <p>Don’t wait until all the leaves are brown! Harvest your garlic when the <strong>bottom 2-3 leaves</strong> have turned brown, but the top 4-5 are still green. This ensures the bulb wrappers are still intact, which helps your garlic store for much longer.</p>
</blockquote>

<h2 id="conclusion">Conclusion</h2>

<p>Planting hardneck garlic is a true investment in your kitchen. It’s a crop that takes up very little space, requires almost no maintenance during the winter, and provides some of the most flavorful food you’ll ever eat. Give it a try this fall—your future self (and your roasted vegetables) will thank you!</p>

<p>Happy planting, and enjoy the garlic-y rewards!</p>

<hr />
<p><em>Placeholder: [Image of a handful of large garlic cloves being planted in a trench and a photo of the curly green garlic scapes ready for harvest]</em></p>]]></content><author><name>Krzysztof</name></author><category term="garden-blog" /><category term="overwinter" /><category term="sidebar-article" /><category term="spring" /><category term="zone 6" /><category term="family-friendly" /><category term="overwinter" /><summary type="html"><![CDATA[Planting hard Neck Garlic: The Zone 6 Fall Power Move]]></summary></entry><entry><title type="html">15-Minute Creamy Spring Pea Pasta</title><link href="https://www.harvest2cook.com/cooking-blog/dinners/family-friendly/creamy-spring-pea-pasta/" rel="alternate" type="text/html" title="15-Minute Creamy Spring Pea Pasta" /><published>2026-03-21T19:00:00+00:00</published><updated>2026-03-21T19:00:00+00:00</updated><id>https://www.harvest2cook.com/cooking-blog/dinners/family-friendly/creamy-spring-pea-pasta</id><content type="html" xml:base="https://www.harvest2cook.com/cooking-blog/dinners/family-friendly/creamy-spring-pea-pasta/"><![CDATA[<p><img src="/assets/images/Mar2026/creamy-spring-pea-pasta-dish-gen.png" alt="Alt Text: A steaming bowl of farfalle pasta tossed with vibrant green spring peas, dollops of creamy white ricotta, and sprinkles of fresh lemon zest and cracked black pepper." />
<!-- Image Generation Prompt: Professional food photography, top-down view of a rustic ceramic bowl filled with farfalle (bowtie) pasta and bright green sweet peas. The pasta is coated in a light, silky white ricotta sauce. Topped with small dollops of fresh ricotta, fine ribbons of yellow lemon zest, and a sprinkle of chopped green mint. Natural morning light, soft shadows, high resolution, appetizing and fresh. --></p>

<h1 id="15-minute-creamy-spring-pea-pasta-the-ultimate-weeknight-win">15-Minute Creamy Spring Pea Pasta: The Ultimate Weeknight Win</h1>

<p>There is a specific kind of magic that happens in the kitchen during late April and early May. The garden is finally waking up, the overwintered scallions are standing tall, and those first, sweet spring peas are ready for their debut.</p>

<p>If you’re like me, you don’t always have an hour to labor over a complex sauce after a long day of gardening or work. You need something that feels like a celebration of the season but comes together in the time it takes to boil a pot of water. That’s where this Creamy Spring Pea Pasta comes in. It’s light, vibrant, and—best of all—most of the “sauce” happens right in the pasta pot.</p>

<p>Whether you’re a busy parent trying to sneak some greens into a kid-friendly dinner or a student looking for a gourmet meal on a budget, this recipe is a guaranteed keeper. Let’s get cooking!</p>

<h2 id="what-youll-need">What You’ll Need</h2>

<p><img src="/assets/images/Mar2026/creamy-spring-pea-pasta-items-gen.png" alt="Alt Text: A rustic kitchen scene featuring a bowl of freshly shelled green peas, a whole lemon, and a wedge of Parmesan cheese on a wooden cutting board." />
<!-- Image Generation Prompt: A collection of fresh ingredients for spring pasta on a weathered wooden table. A small wooden bowl overflows with bright green, plump, freshly shelled peas. Next to it lies a bright yellow organic lemon with textured skin and a rustic wedge of aged Parmesan cheese. Soft, diffused daylight from a nearby window, shallow depth of field, warm and inviting garden-to-table aesthetic. --></p>

<p>This recipe is all about high-quality basics. If you have fresh peas from the garden, use them! If not, a bag of high-quality frozen petite peas works beautifully.</p>

<ul>
  <li><strong>Pasta:</strong> 1 lb of your favorite shape (<strong>Farfalle</strong>, <strong>Fusilli</strong>, or <strong>Orecchiette</strong> are best for catching the peas).</li>
  <li><strong>Peas:</strong> 2 cups of fresh or frozen peas.</li>
  <li><strong>Ricotta:</strong> 1 cup of whole milk ricotta cheese.</li>
  <li><strong>Aromatics:</strong> 2 medium shallots (or 3-4 green onions), finely chopped.</li>
  <li><strong>Lemon:</strong> Zest and juice of 1 large organic lemon.</li>
  <li><strong>Cheese:</strong> ½ cup freshly grated Parmesan or Pecorino Romano.</li>
  <li><strong>Pantry Staples:</strong> Olive oil, salt, and plenty of freshly cracked black pepper.</li>
  <li><strong>Optional:</strong> 4 oz of crispy prosciutto or pancetta for a salty crunch.</li>
</ul>

<h2 id="how-to-do-it">How To Do It</h2>

<ol>
  <li><strong>Boil the Water:</strong> Bring a large pot of heavily salted water to a boil. Cook your pasta according to the package directions for <em>al dente</em>.</li>
  <li><strong>Sauté the Aromatics:</strong> While the pasta cooks, heat a glug of olive oil in a large skillet over medium heat. Add the shallots and a pinch of salt. Sauté for about 3-5 minutes until soft and translucent. (If using prosciutto/pancetta, crisp it up first, then remove and use the rendered fat for the shallots!)</li>
  <li><strong>The One-Pot Pea Trick:</strong> In the last <strong>3 minutes</strong> of the pasta’s cooking time, drop your peas directly into the boiling pasta water. They’ll blanch perfectly right alongside the noodles.</li>
  <li><strong>Save the Gold:</strong> Before draining, scoop out at least <strong>1 cup of starchy pasta water</strong>. This is the secret to a silky sauce! Drain the pasta and peas.</li>
  <li><strong>Build the Sauce:</strong> Lower the skillet heat to low. Stir in the ricotta, lemon juice, lemon zest, and half of the reserved pasta water. Whisk until creamy.</li>
  <li><strong>The Big Toss:</strong> Add the drained pasta and peas into the skillet. Toss vigorously, adding more pasta water a tablespoon at a time until the sauce is glossy and clings to every noodle.</li>
  <li><strong>Final Flourish:</strong> Stir in the Parmesan and fresh herbs. Season generously with black pepper.</li>
</ol>

<p><img src="/assets/images/Mar2026/creamy-spring-pea-pasta-pot-gen.png" alt="Alt Text: A close-up shot of a large stainless steel skillet where pasta and peas are being tossed in a creamy, glossy ricotta sauce." />
<!-- Image Generation Prompt: Close-up action shot of a wooden spoon tossing farfalle pasta and bright green peas in a large skillet. The sauce is creamy, white, and glistening. Steam rises gently from the pan. The focus is sharp on the texture of the sauce and the vibrant color of the peas. Professional culinary photography, dynamic movement, high detail. --></p>

<blockquote>
  <h2 id="pro-tip-the-texture-secret">Pro Tip: The Texture Secret</h2>
  <p>For a more “restaurant-style” vibrant green look, take ½ cup of the blanched peas and whiz them in a blender with the ricotta and a splash of pasta water before adding them to the skillet. It turns the sauce a beautiful spring green!</p>
</blockquote>

<h2 id="conclusion">Conclusion</h2>

<p>This 15-minute meal is proof that you don’t need a lot of time to eat well. It’s bright, creamy without being heavy, and tastes exactly like spring on a plate. Serve it with a simple side salad or a piece of crusty bread to soak up any leftover ricotta sauce.</p>

<p>Give it a try this week, and let me know how it turns out! Don’t worry if it’s not perfect the first time—the best part of cooking is making it your own. Happy harvesting!</p>

<hr />

<p><img src="/assets/images/Mar2026/creamy-spring-pea-pasta-dish-gen.png" alt="Alt Text: Image of a steaming bowl of bowtie pasta with bright green peas, dollops of ricotta, and lemon zest." /></p>]]></content><author><name>Krzysztof</name></author><category term="cooking-blog" /><category term="dinners" /><category term="family-friendly" /><category term="spring" /><category term="zone 6" /><category term="family-friendly" /><summary type="html"><![CDATA[A light and vibrant 15-minute pasta dish featuring sweet spring peas, creamy ricotta, and fresh lemon zest—the perfect quick weeknight dinner that celebrates the season.]]></summary></entry><entry><title type="html">Staple Chicken Noodle Soup: The Ultimate Kid-Friendly Classic</title><link href="https://www.harvest2cook.com/cooking-blog/staple-chicken-noodle-soup/" rel="alternate" type="text/html" title="Staple Chicken Noodle Soup: The Ultimate Kid-Friendly Classic" /><published>2026-03-21T17:00:00+00:00</published><updated>2026-03-21T17:00:00+00:00</updated><id>https://www.harvest2cook.com/cooking-blog/staple-chicken-noodle-soup</id><content type="html" xml:base="https://www.harvest2cook.com/cooking-blog/staple-chicken-noodle-soup/"><![CDATA[<p><img src="/assets/images/Mar2026/staple-chicken-noodle-soup.png" alt="Alt Text: A comforting, steaming bowl of golden chicken noodle soup with fun alphabet-shaped pasta, tender shredded chicken, and tiny bits of carrots." />
<!-- Image Generation Prompt: Professional food photography, top-down view of a white ceramic bowl filled with clear, golden-yellow chicken broth. Inside are small alphabet-shaped pasta noodles, shredded white meat chicken, and very finely minced orange carrots. A single small sprig of fresh parsley sits on top. Natural, warm kitchen light, highly appetizing and kid-friendly. --></p>

<h1 id="staple-chicken-noodle-soup-the-ultimate-kid-friendly-classic">Staple Chicken Noodle Soup: The Ultimate Kid-Friendly Classic</h1>

<p>If there’s one meal that has the power to soothe a sick day, warm up a cold afternoon, or simply win over a picky eater, it’s a bowl of chicken noodle soup.</p>

<p>This Staple Chicken Noodle Soup is my go-to for those busy weeknights when we’re looking for a nourishing, comforting meal that actually gets eaten. It’s designed specifically for kids (and the young at heart!), with a focus on a rich, golden broth and “stealth” vegetables that provide nutrition without triggering any food aversions.</p>

<p>Whether you’re a busy parent looking for an easy, freezer-friendly meal or a student looking for a gourmet bowl of comfort, this soup is a guaranteed keeper. Let’s get cooking!</p>

<h2 id="what-youll-need">What You’ll Need</h2>

<p><img src="/assets/images/Mar2026/staple-chicken-noodle-soup-ingredients.png" alt="Alt Text: A collection of fresh soup ingredients on a wooden cutting board, including carrots, celery, an onion, and a small bowl of alphabet pasta." />
<!-- Image Generation Prompt: A rustic kitchen scene with raw ingredients for chicken soup. Two bright orange carrots, a stalk of green celery, and a whole white onion are arranged on a wooden board. Next to them is a small glass bowl filled with dry alphabet-shaped pasta. A small pile of fresh parsley is to the side. Soft, diffused daylight, professional culinary style. --></p>

<p>This recipe is all about high-quality basics and a few clever “stealth” techniques.</p>

<ul>
  <li><strong>Chicken Broth:</strong> 6-8 cups of high-quality broth (or a mix of broth and water).</li>
  <li><strong>Chicken:</strong> 2 cups of shredded rotisserie chicken or poached chicken breast.</li>
  <li><strong>Aromatics:</strong> 1 whole onion (peeled), 2 carrots (finely minced), and 1 celery stalk (finely minced).</li>
  <li><strong>The “Secret” Ingredient:</strong> A pinch of <strong>turmeric</strong> for that classic, “golden” look.</li>
  <li><strong>Kid-Friendly Noodles:</strong> 2 cups of fun shapes like <strong>Rotini</strong>, <strong>Ditalini</strong>, or <strong>Alphabet pasta</strong>.</li>
  <li><strong>Herbs:</strong> A bundle of fresh parsley (tied with string for easy removal).</li>
  <li><strong>Pantry Staples:</strong> Olive oil, salt, and a single bay leaf.</li>
</ul>

<h2 id="how-to-do-it">How To Do It</h2>

<ol>
  <li><strong>Sauté the Aromatics:</strong> Heat a glug of olive oil in a large pot over medium heat. Add the minced carrots and celery. Sauté for about 5 minutes until they’re soft and almost “melt” into the oil.</li>
  <li><strong>Build the Golden Broth:</strong> Pour in the chicken broth and add the whole peeled onion, the bay leaf, the parsley bundle, and the pinch of turmeric. Bring to a boil, then reduce heat and simmer for <strong>20 minutes</strong>.</li>
  <li><strong>The “Stealth” Move:</strong> Remove the whole onion, the bay leaf, and the parsley bundle. You now have a flavorful, nutrient-dense broth without any “slimy” or “green” bits that might trigger a picky eater!</li>
</ol>

<p><img src="/assets/images/Mar2026/staple-chicken-noodle-soup-InPot.png" alt="Alt Text: A large soup pot on a stove with a rich, golden broth simmering, showing the &quot;stealth&quot; technique of removing large aromatics." />
<!-- Image Generation Prompt: A close-up shot of a stainless steel soup pot on a stovetop. The broth inside is a vibrant, clear golden-yellow. A wooden spoon is lifting out a whole peeled onion and a tied bundle of parsley, demonstrating the "stealth" vegetable technique. Steam rises gently from the pot. High detail, professional cooking blog style. --></p>

<ol>
  <li><strong>Add the Chicken:</strong> Stir in your shredded chicken.</li>
  <li><strong>The Noodle Drop:</strong> Add your favorite “fun” noodles directly into the pot and cook until they’re tender.</li>
  <li><strong>Final Seasoning:</strong> Taste and add a pinch of salt if needed.</li>
</ol>

<blockquote>
  <h2 id="pro-tip-the-golden-secret">Pro Tip: The “Golden” Secret</h2>
  <p>For a more “restaurant-style” vibrant look, whiz a portion of the cooked carrots and celery in a blender with a splash of broth before adding them back into the pot. It thickens the soup slightly and gives it an even richer color!</p>
</blockquote>

<h2 id="conclusion">Conclusion</h2>

<p>This Staple Chicken Noodle Soup is proof that healthy, comforting eating doesn’t have to be complicated. It’s a complete meal that’s full of flavor and light on the cleanup. Plus, it’s a great way to sneak in some extra nutrition without any complaints!</p>

<p>Give it a try this week, and don’t be afraid to swap in whatever “fun” noodles your family loves. Happy cooking!</p>

<hr />

<p><img src="/assets/images/Mar2026/staple-chicken-noodle-soup.png" alt="Alt Text: Image of a colorful bowl of alphabet chicken noodle soup with bright golden broth and a separate photo of the &quot;stealth&quot; vegetables being minced." /></p>]]></content><author><name>Krzysztof</name></author><category term="cooking-blog" /><summary type="html"><![CDATA[A nourishing, golden chicken noodle soup designed specifically for kids and busy weeknights.]]></summary></entry></feed>