Growing Ginger in Zone 6: The ‘Baby Ginger’ Hack
Growing Ginger in Zone 6: The “Baby Ginger” Hack
Can you really grow ginger in a climate where it snows half the year? Believe it or not, the answer is a resounding yes.
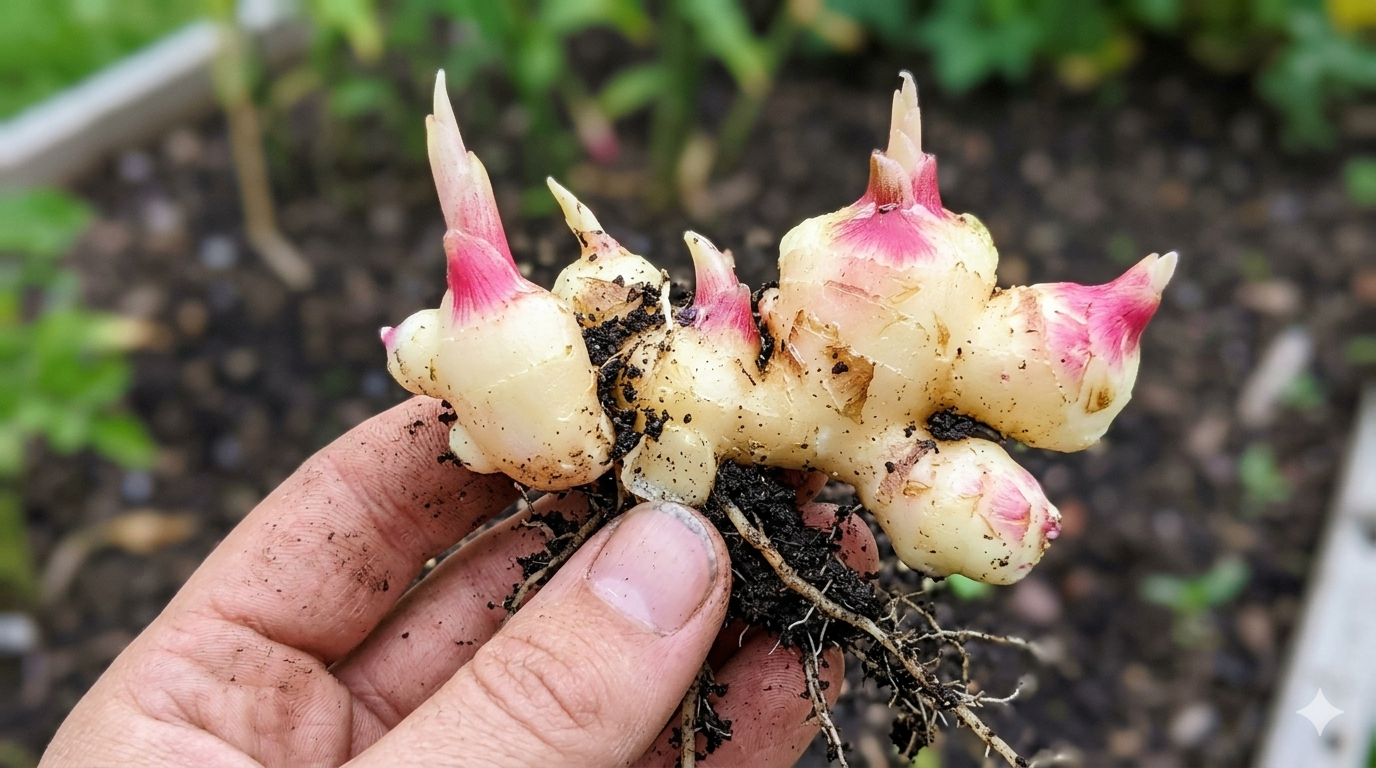
While ginger is a tropical plant that normally needs 10+ months of warm, humid weather to fully mature, us Zone 6 gardeners have a little trick up our sleeves. We don’t wait for the thick, brown, papery skin you see in the grocery store. Instead, we harvest “baby ginger”—a pink-tipped, thin-skinned, and incredibly flavorful version of the root that you literally can’t buy in most stores.
It takes a little patience and a head start indoors, but the reward is home-grown ginger that is less fibrous and much more aromatic than anything you’ve ever tasted.
What You’ll Need

Because ginger is a tropical plant, you’re basically creating a little “mini-vacation” for it in your home or garden.
- Organic Ginger Rhizomes: Buy organic ginger from the grocery store or a specialty nursery. (Non-organic ginger is often treated with growth inhibitors to keep it from sprouting!)
- A Heat Mat: This is the most important tool for Zone 6 success. Ginger needs consistent warmth (70-80°F) to wake up.
- Rich Potting Soil: Mix equal parts compost, potting soil, and a little sand or perlite for drainage.
- Large Pots: I recommend containers for Zone 6. They stay warmer than the ground and let you move the plant indoors if there’s a late spring or early fall frost.
- Liquid Fertilizer: A high-nitrogen organic fertilizer for the peak of summer.
How To Do It
- Start Early (Feb/March): Don’t wait until May! In Zone 6, you need to “pre-sprout” your ginger indoors in late winter.
- Prep the Rhizomes: Cut your ginger into 2-inch pieces, making sure each piece has at least one “eye” or bud. Let the cut ends dry and “callus” for 24-48 hours before planting to prevent rot.
- The Sprouting Stage: Place your ginger pieces in a shallow tray of moist potting soil, barely covering them. Put that tray on a heat mat. This is where most people fail—without that bottom heat, ginger can take months to sprout.
- Wait for the Shoots: Once you see green shoots poking through, move the tray to a bright, sunny window.
- Move Outdoors (June): Once the nighttime temperatures are consistently above 55°F, you can move your pots outside.
- Find the Right Light: Ginger loves bright, filtered light. Avoid placing it in the scorching, direct afternoon sun, which can burn the delicate tropical leaves.
- Water and Feed: Keep the soil moist (but not soggy!) and feed it with liquid fertilizer every 2-3 weeks during the summer.
Pro Tip: The “Baby Ginger” Harvest
In Zone 6, we harvest our ginger just before the first frost in autumn. The skin will be very thin and translucent, so you don’t even need to peel it! Just grate the whole thing into your favorite stir-fry or tea.
Conclusion
Growing ginger in a cooler climate is a fun challenge that pays off in big flavor. It’s a great project for a sunny windowsill and a perfect way to bring a little tropical vibe to your backyard. Give it a try this year—your winter teas will thank you!
Don’t worry if it takes a while to sprout—ginger is famously slow. Just keep it warm, keep it moist, and enjoy the process. Happy gardening!
Placeholder: [Image of a potted ginger plant with long, lush green leaves and a close-up of the pink-tipped baby ginger rhizome being harvested]