Growing Sweet Potatoes from Slips: The Zone 6 Secret to a Bountiful Harvest
Growing Sweet Potatoes from Slips: The Zone 6 Secret to a Bountiful Harvest
If there’s one vegetable that truly feels like summer in a bite, it’s a sweet potato.
Sweet potatoes (Ipomoea batatas) are tropical perennials, meaning they love the heat and a long, warm growing season. But in Zone 6, we have a little bit of a problem: our summers aren’t quite long enough for sweet potatoes to fully mature.
The secret to a successful harvest is starting your sweet potato slips in mid-to-late March. It takes a little patience and a head start, but the reward is home-grown sweet potatoes that are much more flavorful and vibrant than anything you’ve ever tasted.
Whether you’re a busy parent looking for an easy, rewarding project with the kids or a student looking for a gourmet kitchen staple, starting sweet potato slips is a project that’s well worth the effort.
What You’ll Need
Sweet potatoes are grown from “slips”—the green shoots that sprout from a mature sweet potato.
- Organic Sweet Potatoes: Choose organic sweet potatoes from the grocery store or a specialty nursery. (Non-organic ones are often treated with sprout inhibitors!)
- Seed Starting Mix: Use a high-quality, lightweight mix.
- A Heat Mat: This is the most important part! Sweet potatoes are tropical and need consistent warmth to sprout.
- A Shallow Tray: For the soil method (recommended!).
- A South-Facing Window or Grow Lights: Once the slips sprout, they need plenty of light.
How To Do It
- Timing (Mid-March): Don’t wait! In Zone 6, you need to start your sweet potato slips 6-8 weeks before the last frost date.
- Choose Your Method:
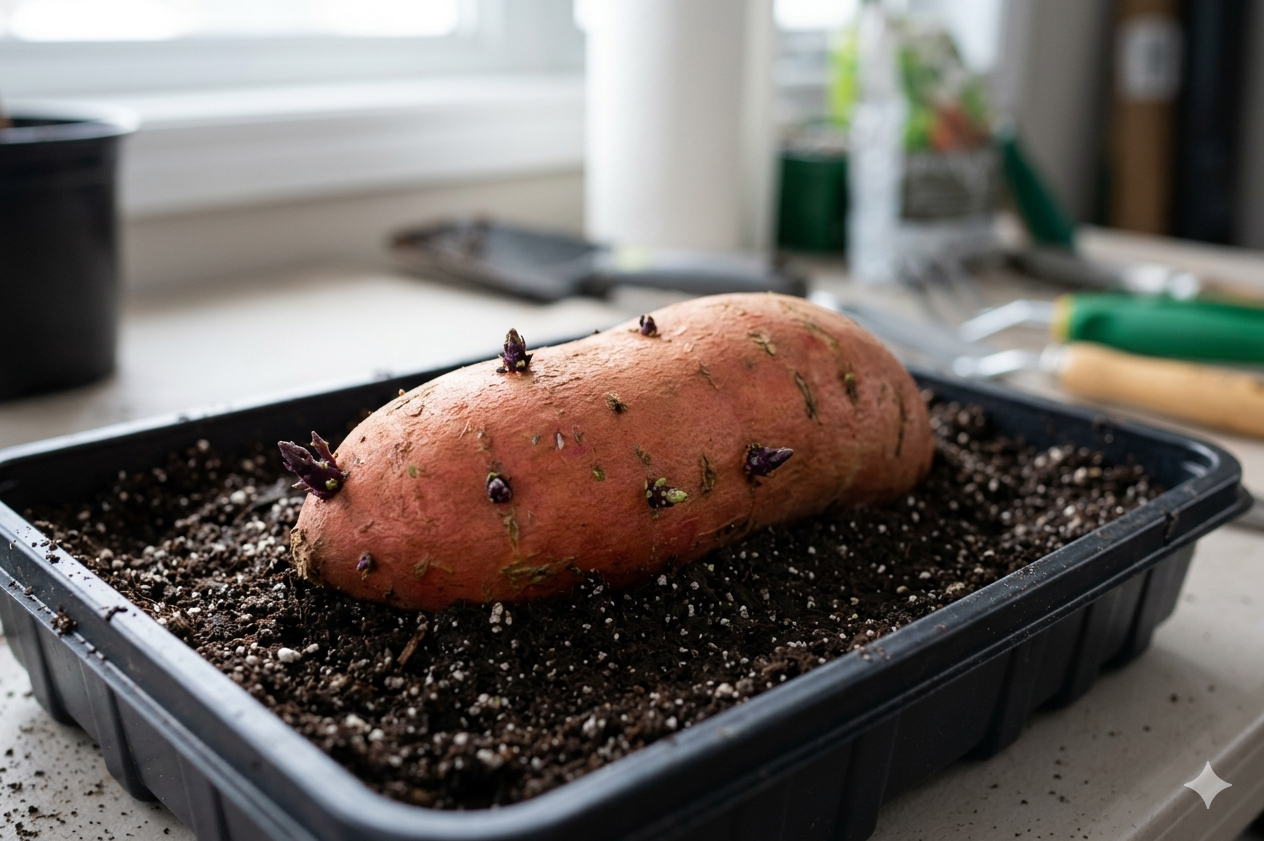
- The Soil Method (Recommended): Lay your organic sweet potato horizontally in a shallow tray of moist potting soil. Cover it halfway and keep it warm with a heat mat. This typically produces more slips and reduces the risk of rot.
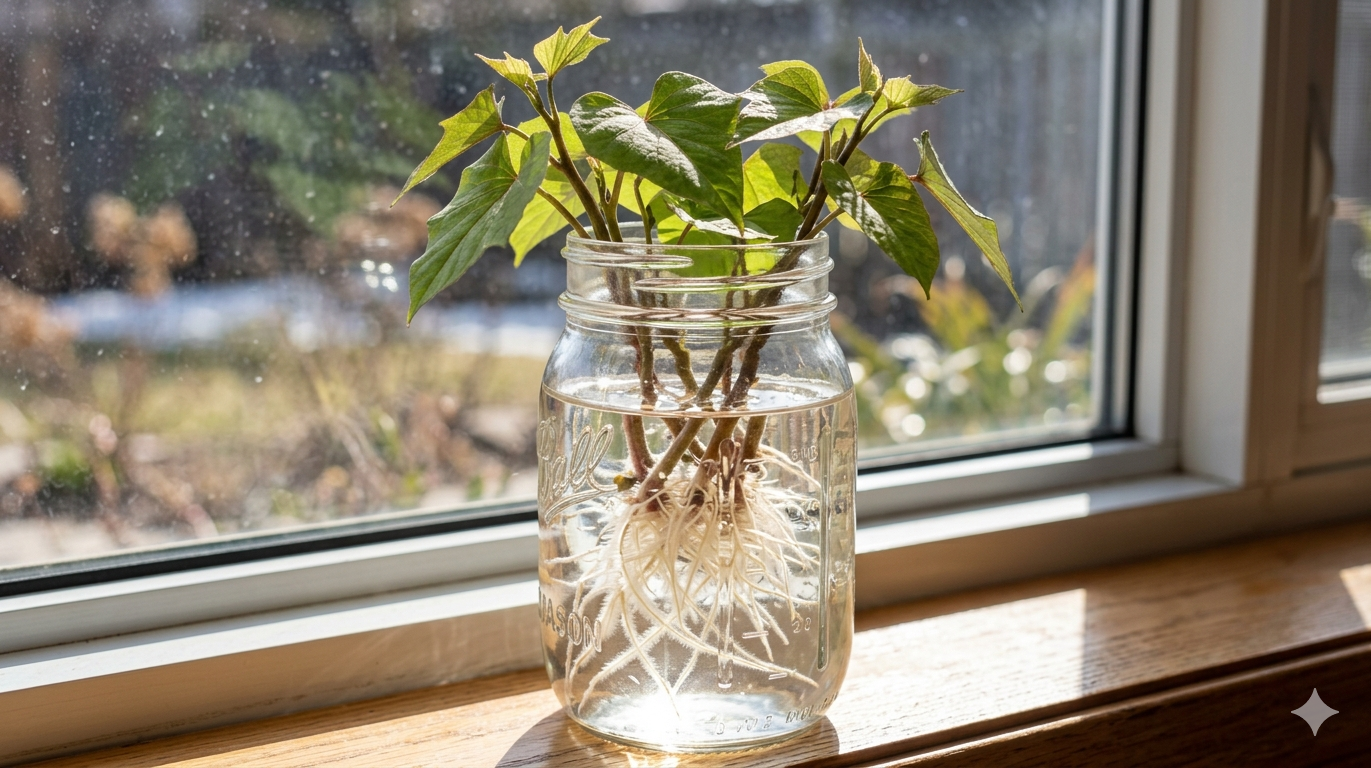
- The Water Method: Suspend half a sweet potato in a jar of water using toothpicks. It’s fun to see the roots, but more prone to rot!
- Wait for the Shoots: Keep the soil or water warm (around 75-85°F). You’ll start to see green shoots poking out!
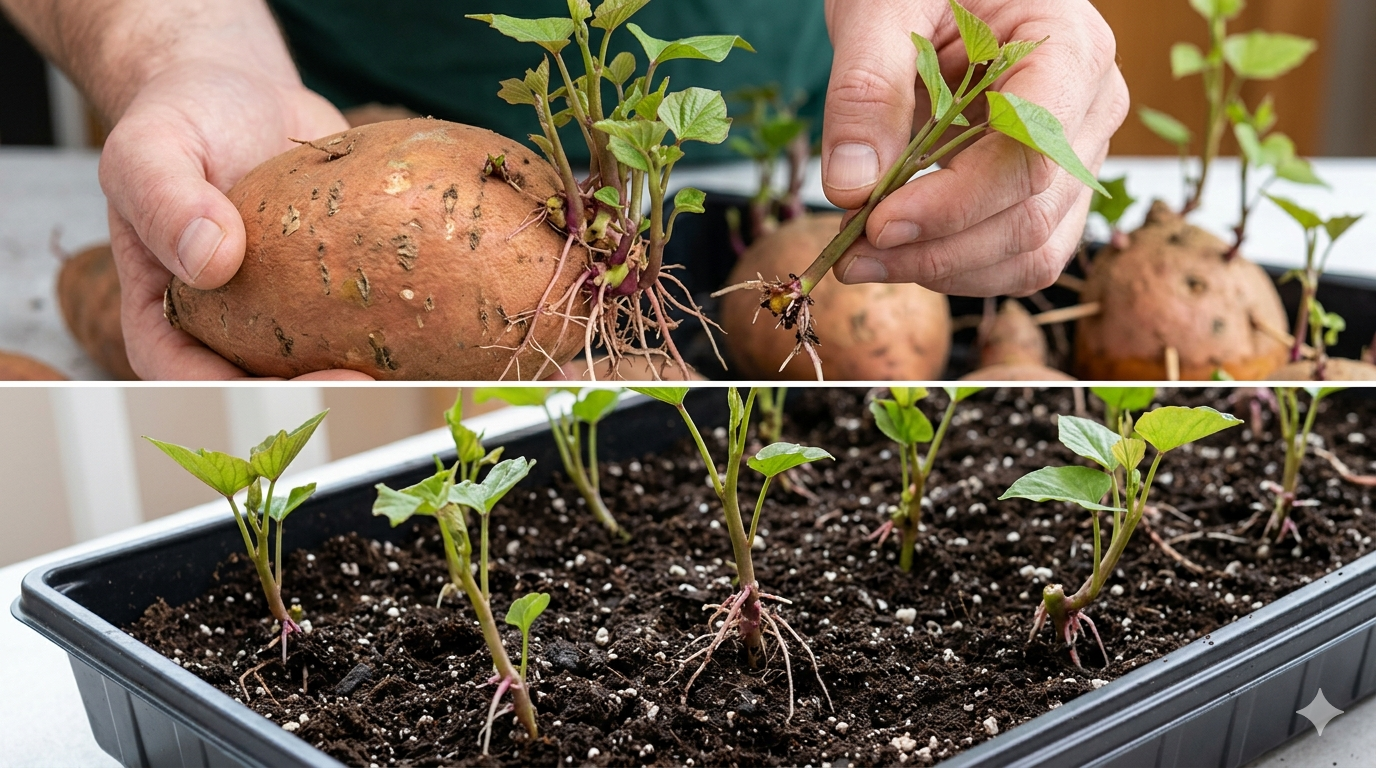
- Detaching the Slips: When the slips are 6-10 inches long, gently twist them off the mother potato.
- Rooting the Slips: Place the detached slips in a jar of water for a few days to develop their own root systems.
- The “Warm Soil” Rule: Do not plant your slips until the soil temperature is at least 65°F and all danger of frost has passed (usually late May or June in Zone 6).
- Spacing and Planting: Plant your slips 12-18 inches apart in loose, well-drained soil and full sun.
Pro Tip: The Essential Curing Process
For those sweet, delicious potatoes, you must cure them after harvest! Cure your tubers in a warm (80-85°F), humid spot for 7-10 days. This converts starches into sugars and heals any nicks in the skin for long-term storage.
Conclusion
Growing sweet potatoes from slips is a fun, rewarding challenge that pays off in big flavor. It’s one of the most vibrant and versatile vegetables in the garden. Give it a try this year—your future self (and your sweet potato pies) will thank you for it!
Happy planting, and enjoy the sweet rewards!
Placeholder: [Image of a sweet potato slip being detached from a mother potato and a separate photo of the soil method being used in a shallow tray]